


Bound button holes are a dividing issue in my sewing class – some of my fellow sewing enthusiasts adore them, others not so much. I’m rather fond of them – and the more of them I do, the better looking they seem to get. Practise really does make perfect huh?
I’m wanting to use a bound button hole on the second iteration of my favourite pencil skirt B8155 (see here) – so here’s how I do it.
Additional things you’ll need beyond the usual scope:
– iron-on interfacing
– some silk organza scraps (or a similar lightweight but strong fabric)
– small scissors (embroidery ones are great)
1. How wide your bound button hole should be depends on the size of your button. If the button is relatively flat, i take generally add an extra 3mm to the width of the button hole slit. If the button is a bit fatter like my one – I’ll add an extra 5mm.
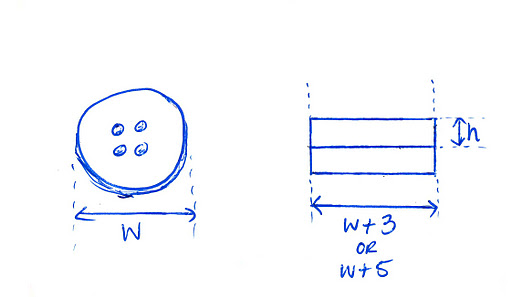
As for the height of the button hole, I tend to go with whatever looks the best – in this case I’ve gone for 2 x 5mm.
2. I’m applying this button hole to a waistband, which already calls for interfacing. If where you are applying your button hole to doesn’t already require interfacing, cut a circle shape about 2x the width of your button hole and apply to the wrong side of your fabric, over the location where you want the bound button hole to be.
At this point I draw on the size and location of the button hole to be on top of the interfacing:
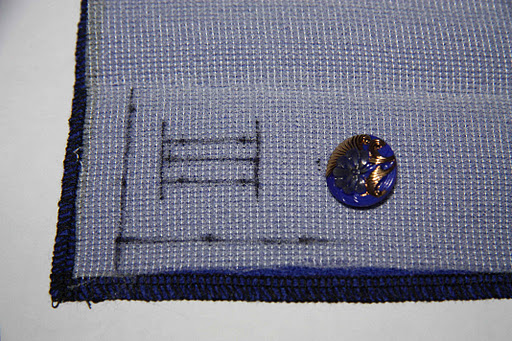
You can see I’ve marked the seam allowances and placed the centre of the button hole in the middle of the waistband.
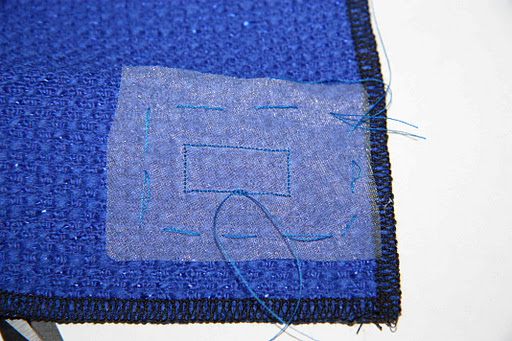
3. Cut a smallish piece of organza (approx. 2x wider than your button hole in each direction) and baste it to the right side of your fabric, over the position where the button hole will be. I’ve put a pin in each of the corners of the button hole drawn over the interfacing on the wrong side so you can see where it will be located:

4. With your smallest stitch (I’m using 1.0) and starting in the centre of one of the longer sides, sew around your bound button hole, pivoting a the corners. This will be the guiding rectangle when it comes to attaching the button ‘lips’, so it’s really important to get this straight and square. Trim off the dangling threads and remove the basting.
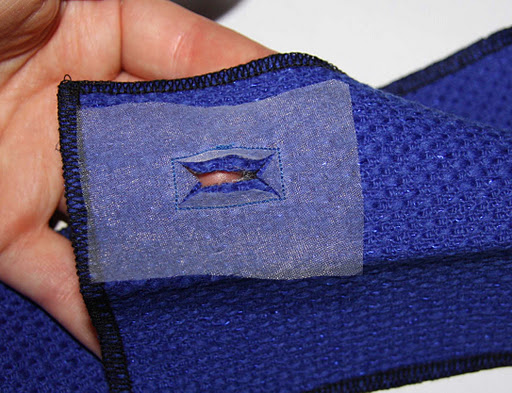
5. Using your small scissors, make a cut along the centre line of the button hole. Stop the cut at 0.5cm from the end (the same as the height of your button hole lips) and cut on the diagonal right up into the corner:


6. Now we’ll make the ‘lips’ that sit behind the panel we’ve just created. Cut two rectangles of your shell fabric, and sew in your machine’s basting size (anything greater than a size 4 is perfect) down the centre (we’ll be removing this later on):

When folded back over each other, these two pieces of fabric will form the ‘lips’ of the button hole:

Iron them flat.
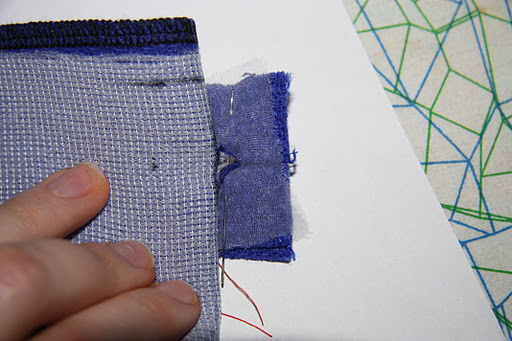
7. Align the ‘lips’ and secure (I prefer to baste, but you can also pin. I may have gone a little overboard on the basting, but it’s important it’s well secured, otherwise you end up with a crooked opening) to your button hole. Note how the basting doesn’t go over the two shorter ends – this is because we’ll be sewing these bits next!

8. I find this next bit the trickiest part – with the right side of the fabric facing up, fold back the shell fabric so that you can see the triangle of fabric on top of the button hole ‘lips’. Pin the little triangle down and sew across and over, getting as close to the stitch line of the guide rectangle as you dare.
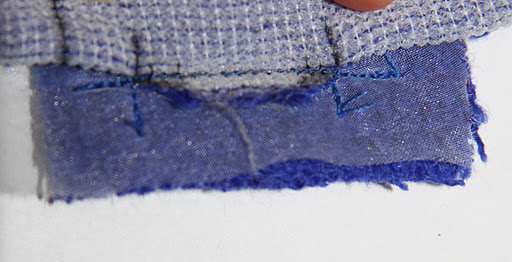
Once I’ve done one shorter edge, I flip it around and do the other shorter edge.
Then, removing the basting from one of the longer edges, do the same again along this edge – then again on the last of the longer edges. Once you’ve got all your sides sewn, you can cut the basting stitch holding the lips together.
9. I tend to trim back the two squares of fabric making up the lips to reduce bulk at this point, but that’s up to you.
You’ll now need to repeat steps 2 through to 5 to create the button hole window on the piece of fabric that will be on the other side of the button hole – in my case, the other side of the waistband:
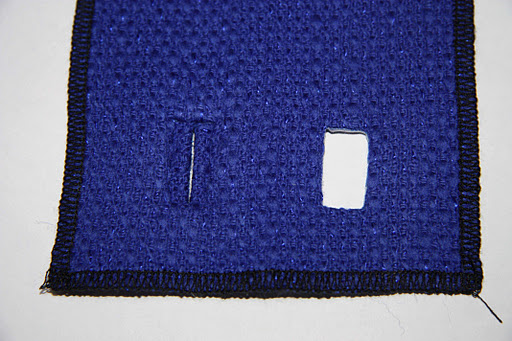
On a coat, this would be the lining fabric. Then you’ll need a needle and matching thread to join the two sides together.
Whallah! One beautifully bound button hole :)


If the one for your skirt turns out as brilliant as this you will be pleased. Looking forward to seeing the finished skirt…
Wow – I've not done this type of button hole before, but these instructions are detailed and easy to follow. I have this pattern which I'll be sewing a skirt for a girl friend (a surprise gift) and this will definitely be helpful. Thanks for posting.
You'll love this skirt pattern Evelyn – I've tried every single pencil skirt pattern out there (at least, that's how it feels!) and this is by far my favourite :)
I'm looking forward to the day I'm ready to do this. Right now, I'm trying to get the inside of my garments to look as nice as the outside! Not easy, that's for sure! Well, for me… :P