


The first time I was shown how to do this, it was (and still is) one of the most ‘a-ha!!’ moments in sewing I’ve ever had. I still grin to myself when I pull the fabric through to the right side when done!
When you need to apply a facing (or a lining) to a garment with no sleeves, and the facing/lining is joint to both the neckline and the arm holes, like with my Marfy Top above, this little trick will allow you to have the same finish at the arms as what you have at the neck.
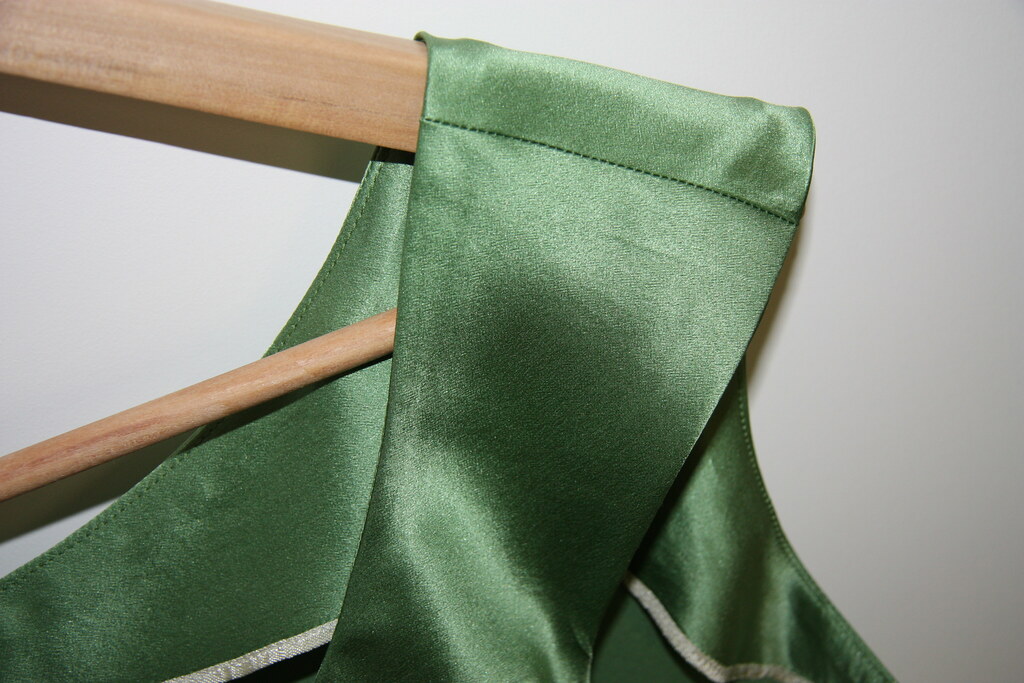
1. Sew and then under stitch your facing/lining to the neckline. Clip and press as is required. You now have a beautifully finished neckline, but you need to somehow get the same finish on your arm holes:

2. Here’s that ‘a-ha!!’ moment I was talking about. With the wrong sides of the fabric facing, roll up your garment towards your unfinished arm hole:
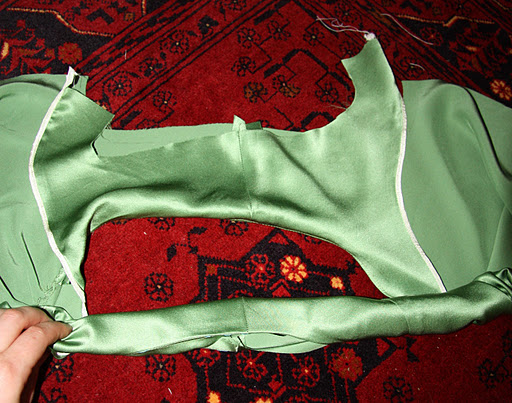
Try to keep it as tightly rolled as you can.

3. Keeping a grip on your roll, fold one of the loose ends back over the roll, so that it comes around and meets the other loose edge:


Now the right sides are facing each other. If the shoulder seam was rather narrow, you can pin the ‘roll’ inside your shoulder strap so it stays in place.
4. Sew your lining or facing seam – press flat to set and clip where necessary.

5. To turn this back around, simply pull the rolled fabric back through the shoulder. Roll the seam between your fingers to get the seam on the fold, then iron flat.
6. If you wish, this is the point where you can under stitch the seam allowance to the facing or lining, going up as far as you can towards the shoulder seam.
To get a nice finish at the start of the under stitch, flip your bodice over so you’re looking at the thread on the wrong side of the fabric – pull this so that the loop holding the two threads together comes up. Using your quick-un-pick or a pin, pull the top stitch thread all the way through, and tie them both off with a knot.
Repeat steps 1 through 6 on the other side, and there you have it! Your sleeveless bodice is lined (or faced) to perfection :) All you need now do is to sew the side seams.

Oh,my! This tip is amazing!!! What a beautiful top, too. I have only recently heard of Marfy patterns, and this top has definitely made me want to try them out!!
I am saving this for sure. Thanks!
Glad to help :)
Do i have to understitch on the armholes?
You don’t ‘have’ to do anything. But the under-stitching helps keep the lining to the underside, as unless you’ve accounted for turn of cloth and have your lining pieces a bit smaller than your bodice pieces, the lining will tend to peak out. How much so depends on what type of fabric you’re working with.