

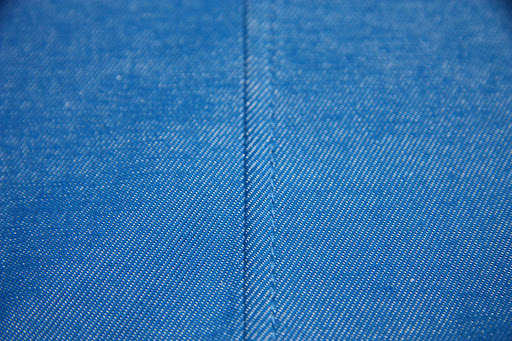
You’ll know these best by the seams you see down the sides of your favourite RTW jeans. I first learnt how to do these by joining in with Peter Lappin’s Male Pattern Boldness boxer short sewalong.
Flat Felled seams are a great finish, and good for strengthening your seams – much in the way pre-tensioned steel is great for increasing the tensile strength of concrete. But enough geek blabber. This seam finish allows everything to sit nice and flat, and can also be used to reduce seam bulk. Lets get started.
1. Sew your seam as per normal. So far, so good.

2. If you’re sewing with a heavy fabric like me, grab your scissors and trim back one of the seam allowances by just over half, like so:

Iron your seam to stabilise it:

And then flatten you seam with the smaller seam allowance on top and iron flat:
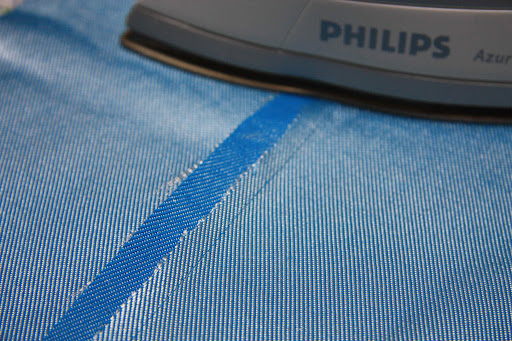
3. Keeping your iron on standby, fold the larger seam allowance so the raw edge meets the seam:

Iron the fold in place.
4. Then fold the seam over so the raw edge is enclosed:

Iron flat again then top-stitch!
But what happens when you need to use a flat felled seam on a curve with a fabric that doesn’t give? Carolyn has a fabulous answer – by using a row of gathering stitch to pull the fabric into line. Check out her post on this here.

Wow, this is so simple! I had no idea! Thanks for sharing!
That is by far the best demonstration I have ever seen of a flat-felled seam!!
Excellent tutorial.
Great tutorial! Really, this is one of those techniques that takes a bit more time, but is much easier than you'd think.