
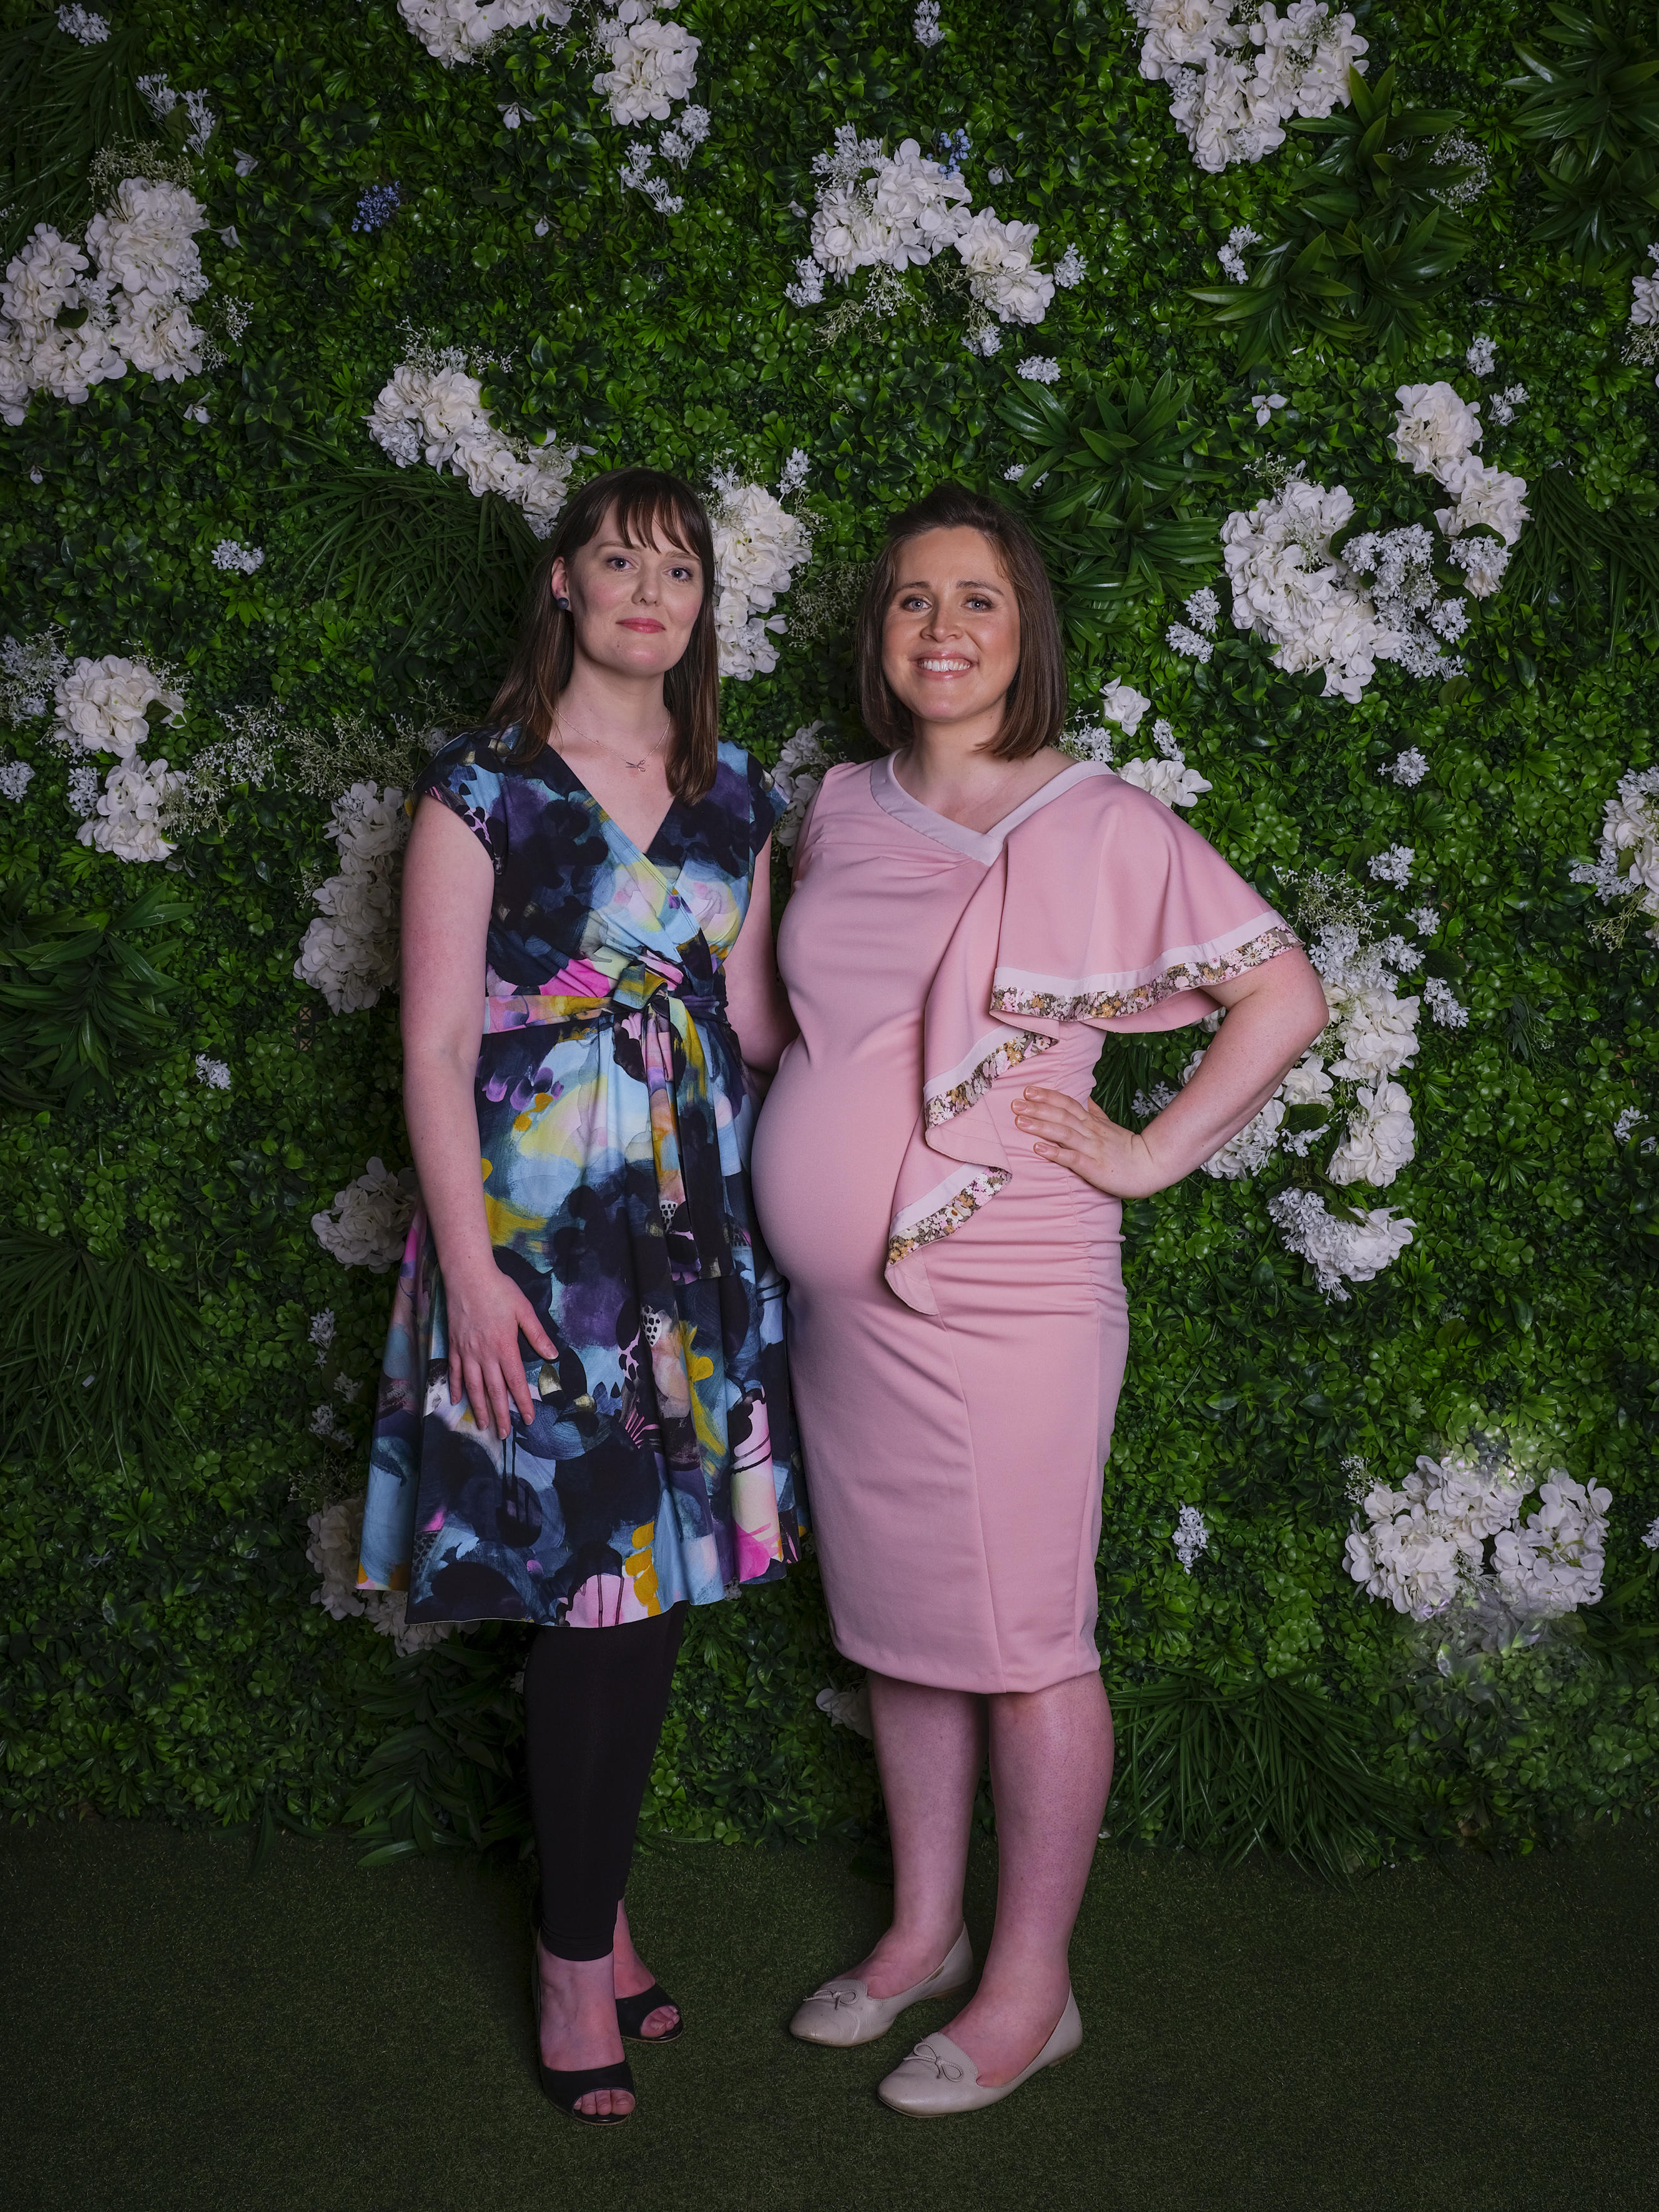
Presenting one full-term preggasaurus rex, attending the 2019 Melbourne Frocktails:
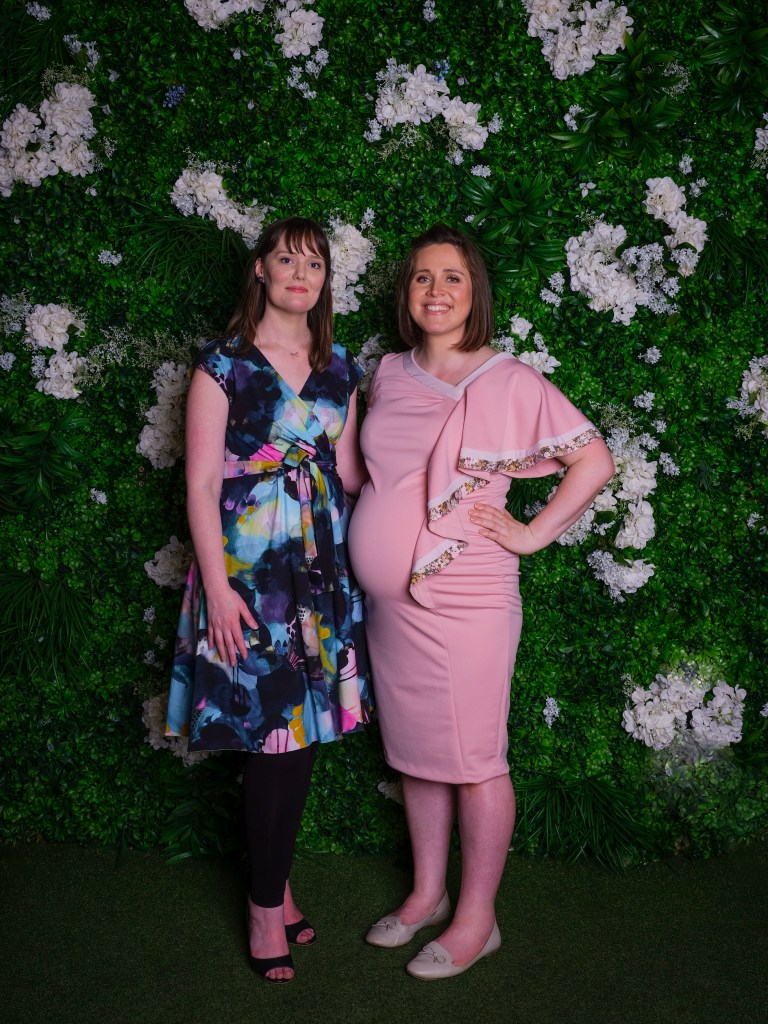
It’s been a while since I attended a Frocktails event, which was the brainchild of my sewing besties (Kat – @allthewhimsicalthings) – so lovely to see how this event has hit a real chord, with there now being Frocktails events in many cities around the globe! Here’s an oldie but a goodie from the very first Frocktails, back in 2013! It’s gotten to be such a big event in Melbourne that there is now several people organising it, and I believe this year there was 150 tickets sold (big ups on the 20-25 odd who attended the first). I’ll admit I was a little hesitant to even book a ticket for this considering it was basically a month of my due date. I recall that by this stage last time, it was all I could do to stay awake!
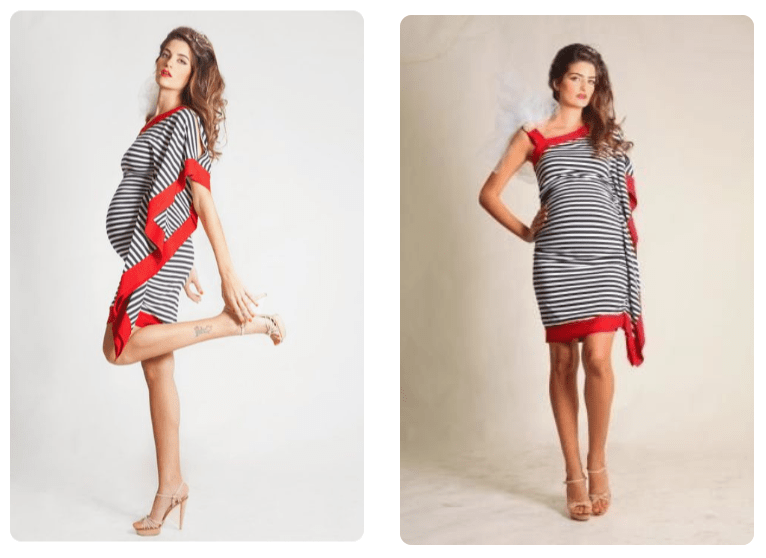
I’ve had the below dress saved on my Pinterest since pre my first pregnancy, by a designer named Orly Rodrigue (it was, but is no longer, listed on Etsy):
I had a top pattern in my stash that was nicely aligned to this in style – Marfy 3646, from the 2015/16 Catalogue (#93):
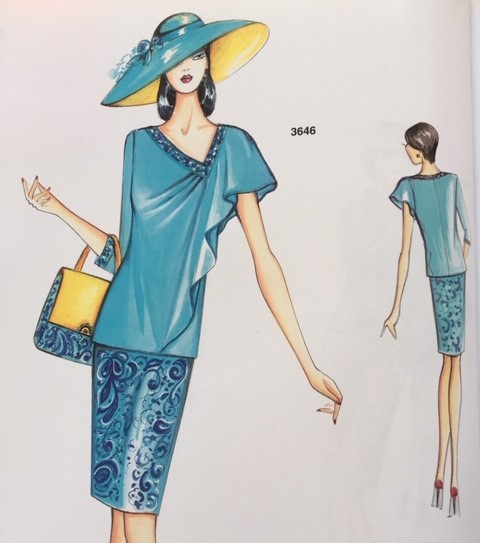
“Semi-fitted blouse with converging pintuck detail on asymmetrical scoop neckline. Can be made with a side frill and single palm-length sleeve, or sleeveless with frill over one shoulder”
FABRIC
As this was likely to be a one wear wonder I didn’t go out much on fabric, picking up a heavyweight, spongey, crepe-like pink knit with really good stretch and recovery, and a co-ordinating cream knit (much lighter in weight and not great stretch or recovery properties) both from Rathdowne Remnants. The pink I got 4m of – so I could properly muslin and adjust the above pattern for knit AND my current shape – the fabrics were both well under $10/m so all up I think I spent about $50, including notions. Pretty thrilled with that. Although, I think in the end this pink crepe knit was a bit too stable/thick for this particular dress, and a lighter weight, more stretchy knit would have been a better choice. But, as you know, finding the perfect fabric in a pinch never gets you exactly what you’re after ;)
I also had some pretty Liberty swimwear print in deep stash that matched really nicely that I also pulled into the fray – which I suspect is the ‘Betsy Argyll’ pattern, which I absolutely cannot find a stock photo/link of!
Recommended fabrics for the pattern were ‘jersey, cotton and satin’, again indicating that there would be ease aplenty due to being suitable for both knits and wovens.
MUSLINING AND ADJUSTMENTS
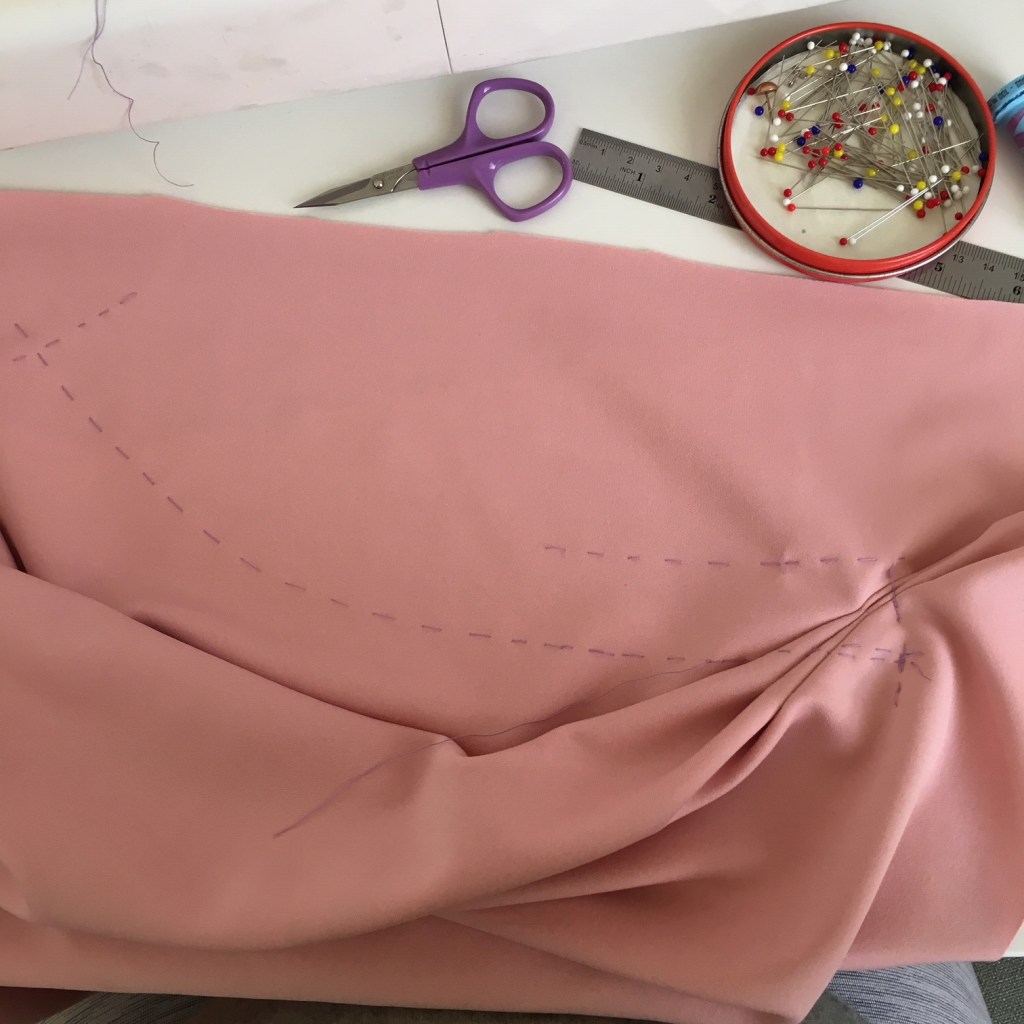
I started by ‘whipping up’ the top half of the top pattern to test drive the construction order and sizing/fit. The pattern was my usual size 46 – I’ve found that the inclusion of the words ‘semi-fitted’ in the pattern description typically tends to indicate it will be fairly loose fitting below the bust for me, which perhaps meant it would now have adequate ease. Still, I thought may need a little extra room up top considering how excited my bewbs tend to get about an impending baby…
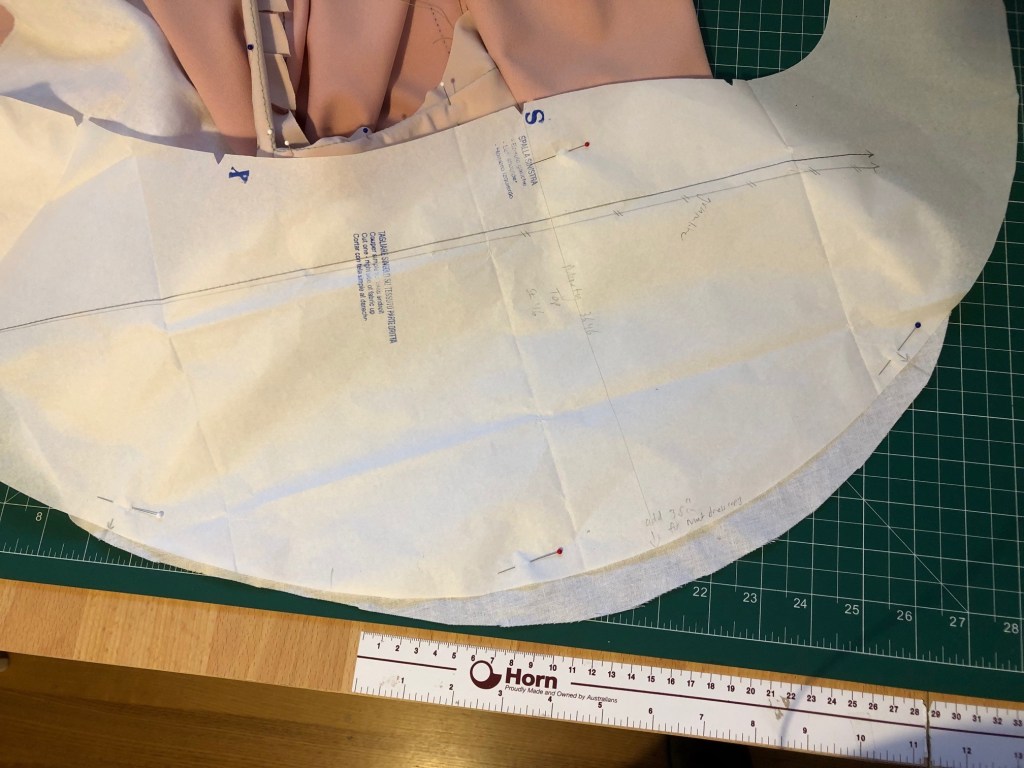
I’m a little rusty in the Marfy pattern puzzle game, but the relative complexity of this particular pattern caught me by surprise, mostly around how the flounce ties in around where the gathering and asymmetrical neckline converge, and follows through to the back.
You can see the front is split into two pattern pieces, and the flounce at the front appears to be sewn into the seam that joins the two together. Except that the contrast neckline band is attached to the side pattern piece, and not the front:
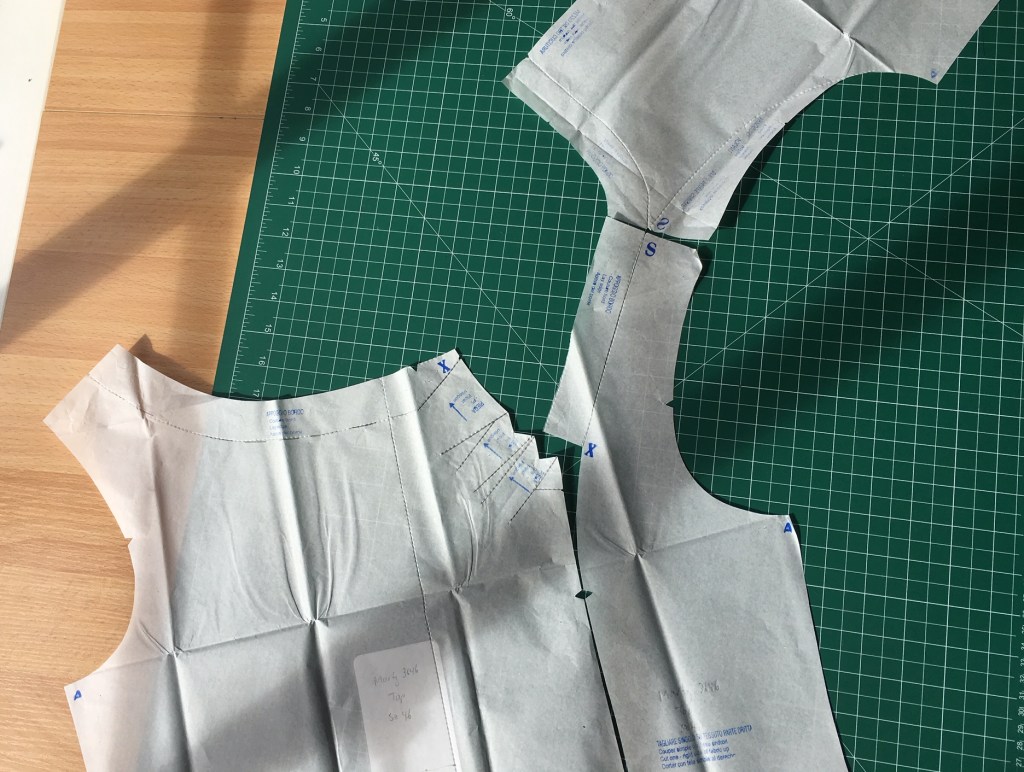
The flounce continues on at the back, but appears to be sewn onto back, not into it – because there is just one pattern piece, and a line that indicates where the flounce seam goes.
My solution was to treat the flounce the same as the hard angle – half sewn in and half sewn on. I stabilised the transition/match point with tiny stitches, then clipped to the stitches. This allowed the flounce to be sewn into the lower front pattern pieces, then switched to being sewn on top of the front side and back pattern pieces. This gave way to the first muslin, which I was well pleased with:

Which I was well pleased with – although I was at this stage wanting to heavily expand on the flounce to get a more dramatic affect, a la my inspiration dress.
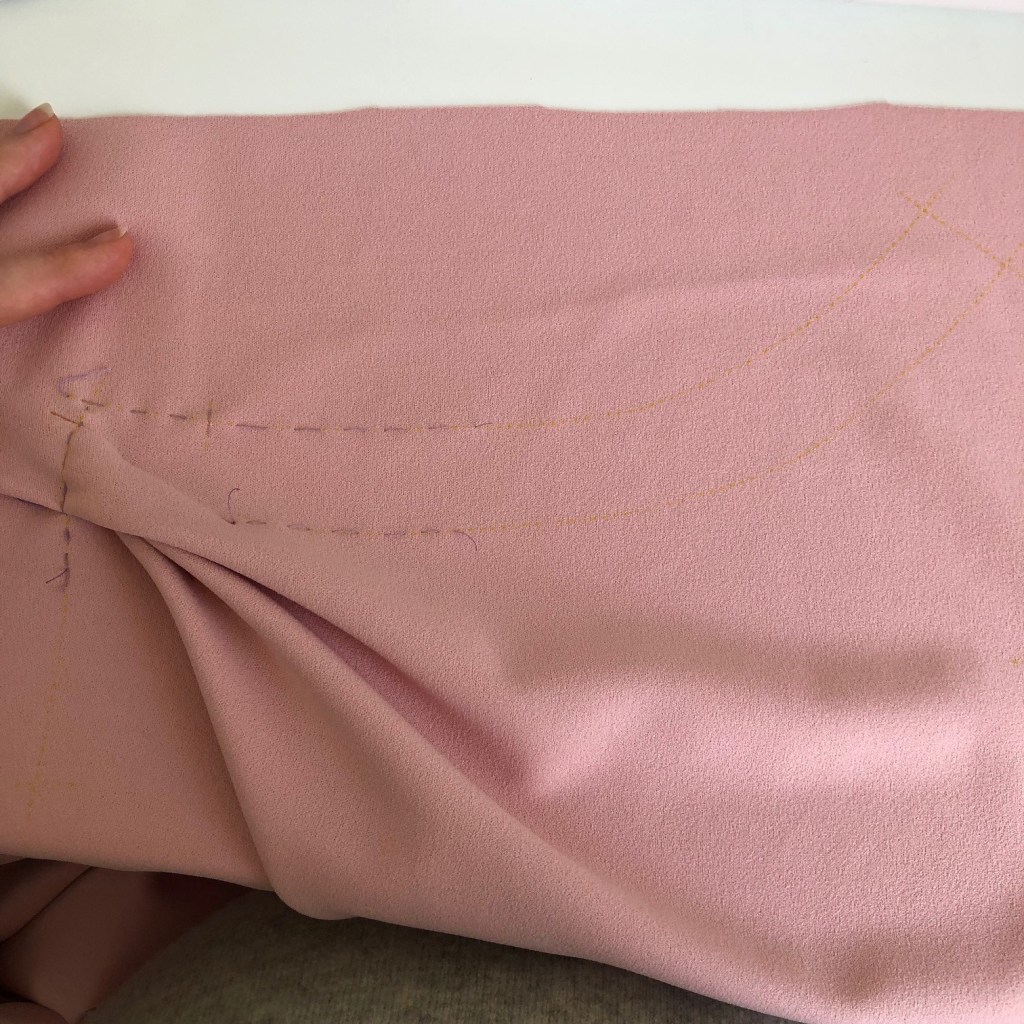
At this point I procrastinated for several weeks in drafting the full length bump accommodating deal for the second muslin, for which I roughly stole from the Megan Neilson ruched maternity ‘Erin’ skirt (a real winner of a pattern, and a skirt I’ve worn extensively through both pregnancies).
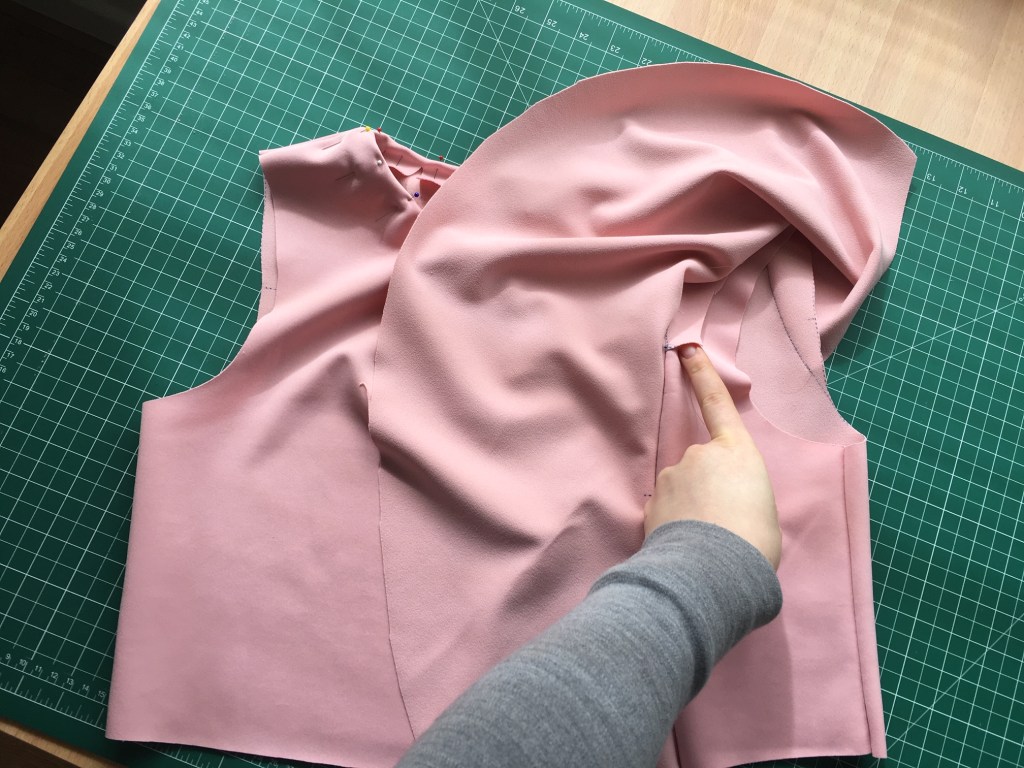
Muslin #2 also included trialing how to attach the trim fabric – which I ended up attaching onto each individual pattern piece, before sewing them all together. The front and back require a little bit of fiddly sewing, matching those curved seams, but the side front panel you can just slap the trim on, because all four sides of this part get enclosed later on. A bit of basting is required…
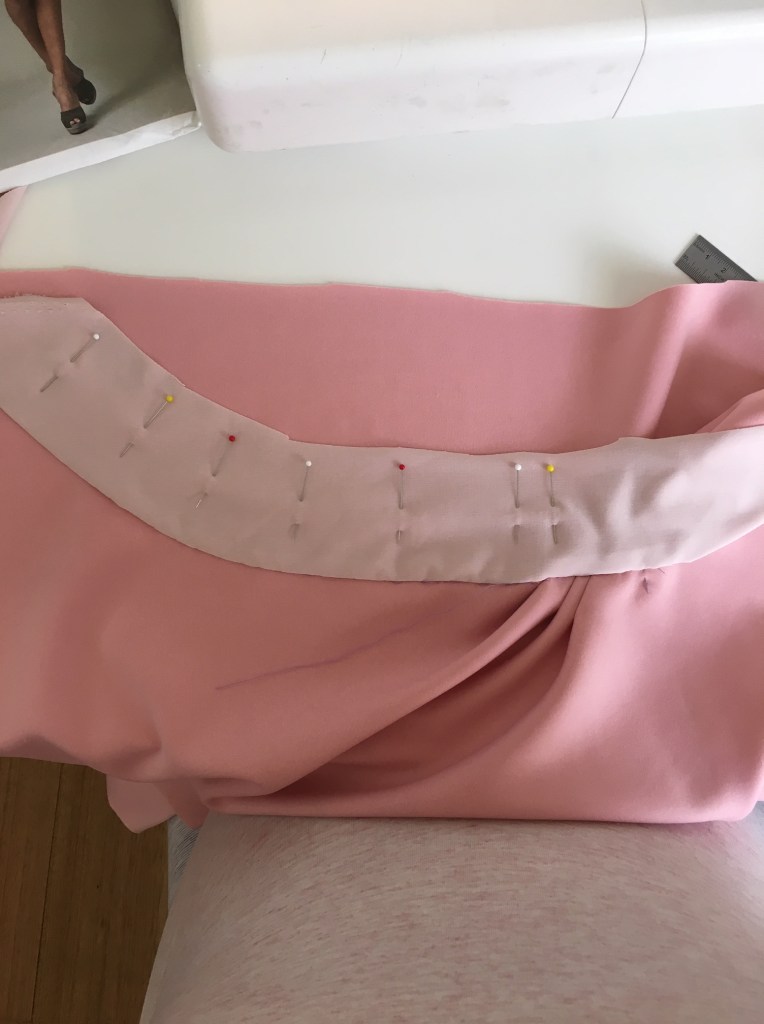
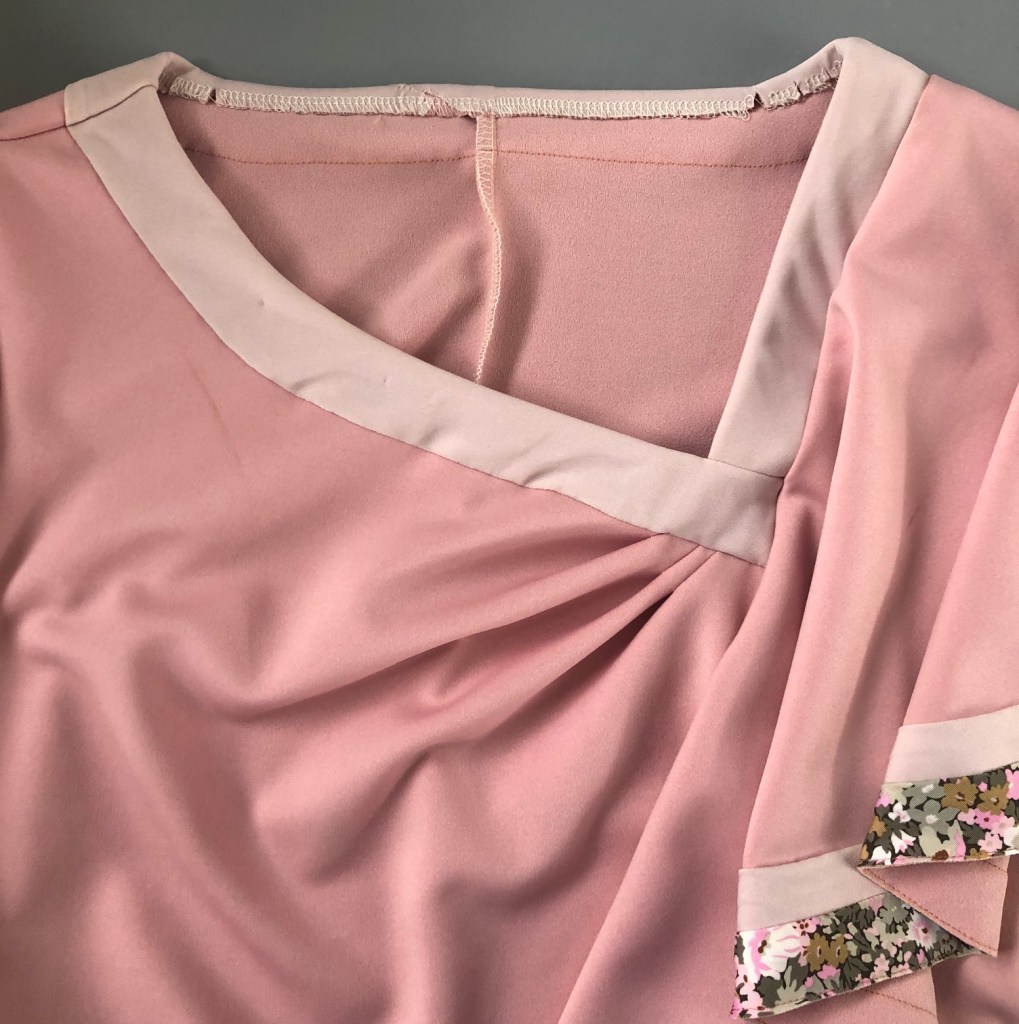
As well as some fiddling with the darts to get their placement correct before sewing on the trim. I’m convinced these are intended to be directed down – you can see the reverse side of the darts here, and how nicely the basted lines line up to show the perimeter of the pattern piece:
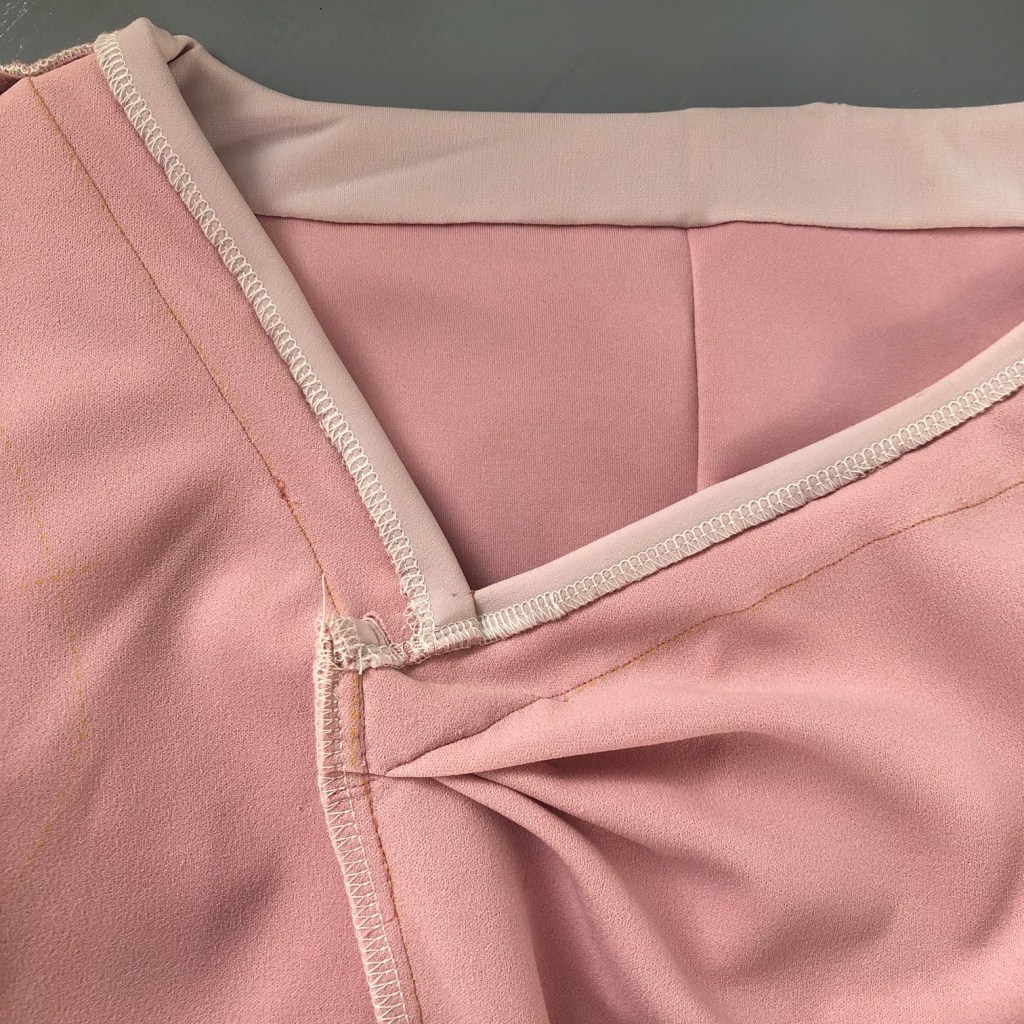
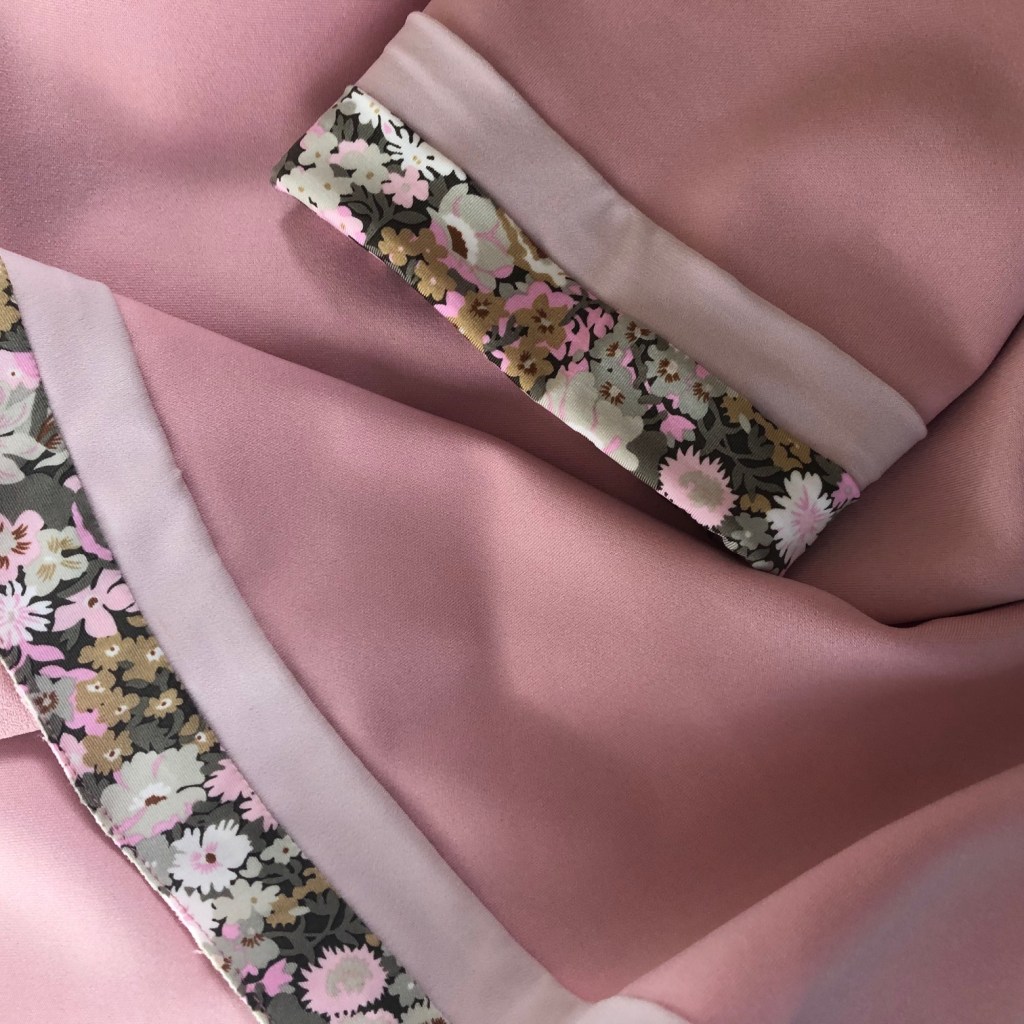
The pic above is the insides once finished, which I’m surprised that it all came together so neatly! I slip stitched the trim down on the inside to avoid top stitching.
I thought I would play with elongating the flounce regardless of the first muslin – but it was incredibly challenging to actually better the way the original pattern piece sat. Marfy Drafting = 1, Me = 0. In the end, stubborn ol’ me just added a small amount for the sake of feeling like I’d ‘won’.
CONSTRUCTION
By this point, I had less than a week before the event (are you even sewing for a Frocktails event if you’re not at least hemming your dress on the day?!?!) I cut the whole thing out, basted and sewed those tricksy pleats, stay stitched the ‘hard corners’, sewed on the trim fabrics, then joined the pieces all together.
Final fitting came with pegging the skirt hem a tad (this is below the pull lines at my hips, which is more from my trying to force the fabric to wrap around my bump, rather than just hang from it, which was the fabrics preference), and adding in elastic at the side seams to make the excess fabric on the back pattern piece appear to be a design feature…
The pattern comes with a sleeve pattern piece – I had actually cut one of these out already – November weather in Melbs can either be stinking hot (ie no sleeve required!) or freezing with sleet/hail/winds/general-craziness. By the time the weather forecast came around, it was a freezing night – definitely going to be a case of adding a sleeve! Seeing the coats, scarves and jackets of 150 people piled up on tables and chairs as one arrived, just meer weeks before summer was officially to start… #Melbourne.
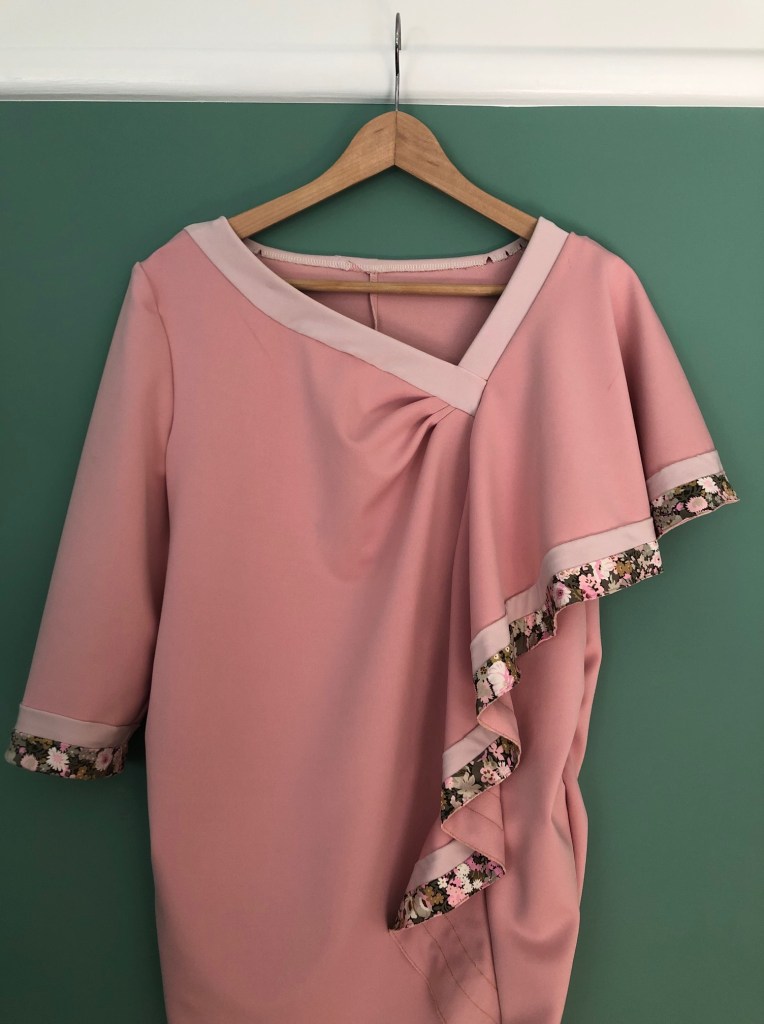
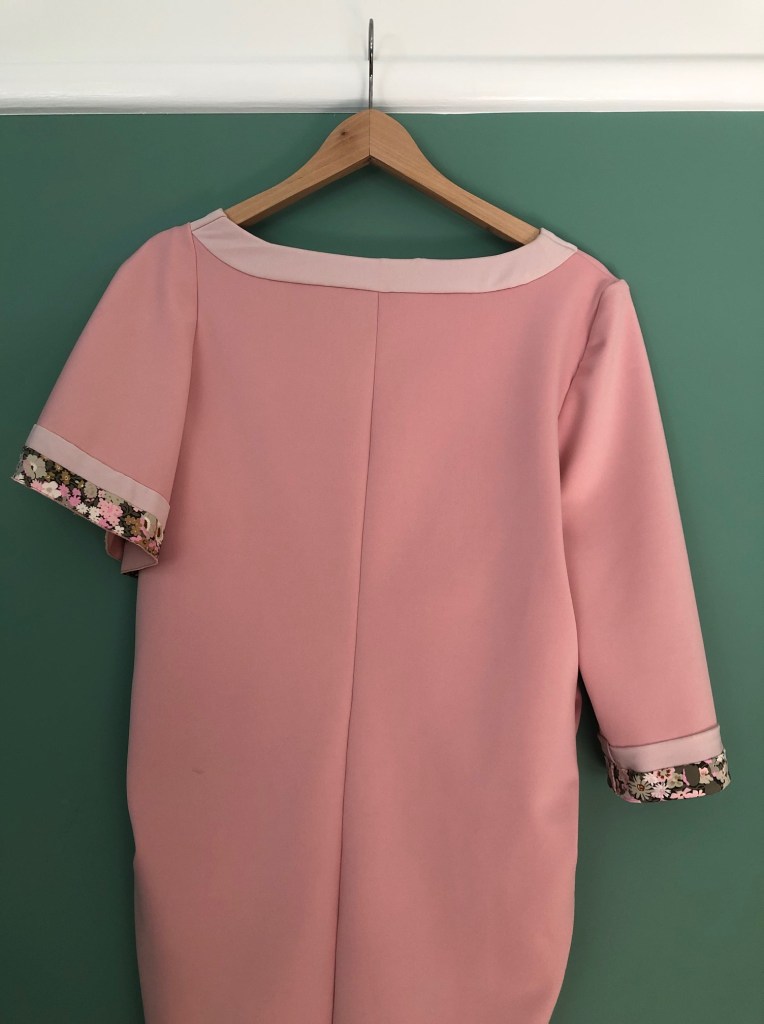
Silly me completely forgot to get any photos whilst actually at Frocktails, beyond the one up top. So here are a few post-event closeups of the details:
I would have really liked to have the time to take the flounce trim on the underside, however time (and energy) constraints prevented this…
I will absolutely definitely be making this pattern again, albiet as a top and likely using much lighter weight fabrics – I really love the angled neckline, the way the pleats sit across my bust and the single shoulder drape.
GIVEAWAY
Seeing as this is a bit of a once only wear dress, I’d be happy to send this off to someone in a similar, or soon to be in a similar position to me – heavily pregnant and in want of a Dress to wear! If this is you, you’re aligned with Marfy size 46 when not pregnant like I am, and you’re in Australia, drop me an email (poppykettle at gmail dot com) and we can organise for it to come your way. And in the unanticipated event that there is more than one person in this situation – first in will be the best dressed!

Good on you , what a gorgeous dress. Good luck for the big day. X
Thanks!