
Does this post indicate a return to blogging? Perhaps. Maybe. Who knows. Whilst I have been sewing, it’s been sporadic and highly impacted by life in general. Full time work and a young family really leave very little personal headspace, let alone free time to pursue hobbies.
Whilst it’s been a long while since I last regularly updated this space, I have been thinking about sewing, buying fabric (I’ve since consigned myself to the fact that this is indeed, an entirely separate hobby) and hanging out with the friends I’ve made through sewing (sewing friends truly are the best of friends). I have a vague yet strong aspiration to try and make a youtube video, who knows when that might eventuate.
Shortly after I gave birth to my second daughter (Hazel, she’s a delight), that virus blew up, and then the lockdowns hit. They hit really hard where I was. I went back to work early having been promoted whilst I was on maternity leave (yes – it does happen!) – but ended up with burnout and a nasty case of depression and ended up leaving that role after just a year. Turns out you can have it all – just not all at once. The great work-life-balance mystery is a lie, because anything worthwhile doing well seems to unbalance your life! I’ve been clawing my way back to a new normal, and whilst I’m not quite there yet, I’m in a better place than I’ve been in a long while.
I eased myself back into sewing by updating my ‘lounge wear’ wardrobe – sewing through my entire stash of french terry, all items from which have been worn a lot. I really enjoyed this sewing – stretch for comfort, minimal fitting (I put on a lot of weight post birth #2/during lockdowns), requiring not much brain space – something I found myself having surprisingly little of. I’ve got some great pieces in regular rotation as a result – Hudson pants, Style Arc Joni knit pants, and sweatshirt style jumpers I all love wearing.
But – my fabric stash is predominantly made up of fabrics that are best suited for suits – workwear, coats, smart office attire. Not only am I strongly drawn to these fabrics; it’s also the kind of clothing I enjoy sewing AND wearing (when I’m not in sweats). And once I’d sewn up the last piece of french terry from my stash, it was time to face down a return.
Marfy 6107 is a great gateway garment in this respect – not overly fitted, no obvious complex closures – just lots of the good stuff (ie plenty of actual sewing).
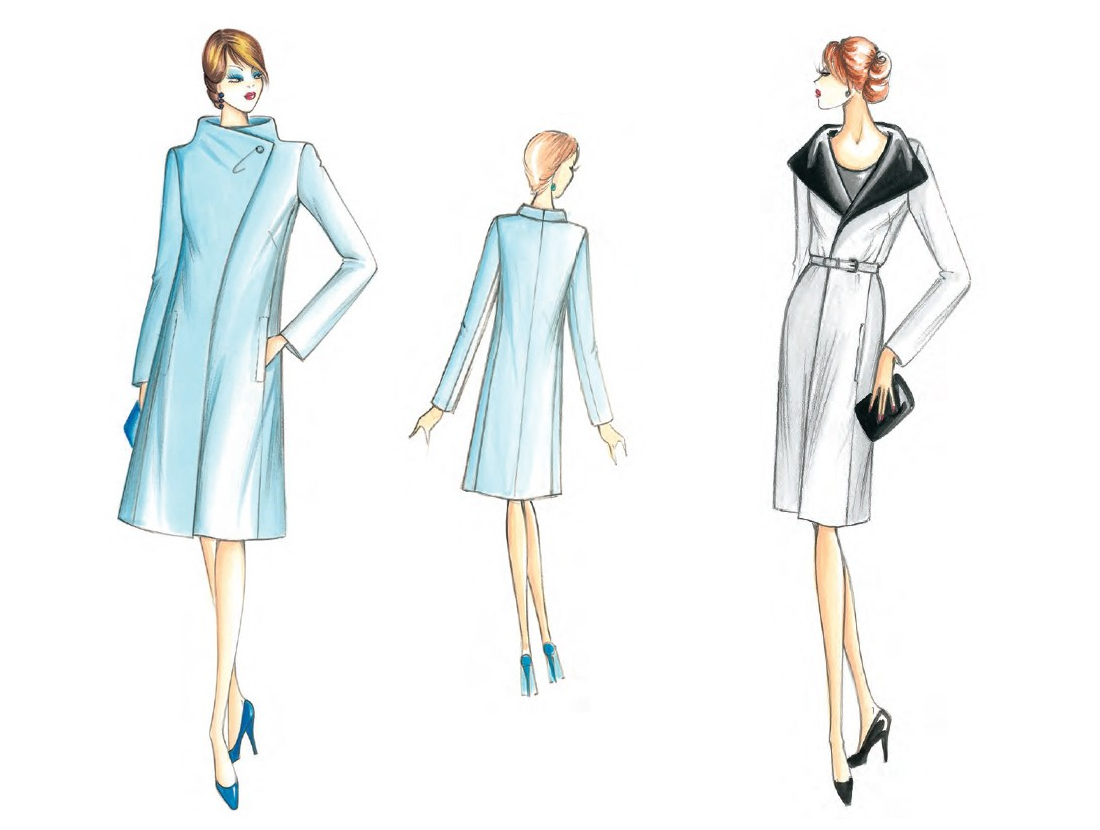
Threads magazine did an overview of it that describes it well – “This updated classic coat has an exaggerated funnel-like, cut-on collar that may be worn closed with a button or open. It also features front and back princess seams, in-seam pockets, two-piece sleeves, and a center-back seam. The semifitted silhouette flatters the figure with the small bust dart emerging from the princess seam and has a hidden snap closure”. I would go further and say that depending on your fashion fabric choice under the underlying structure you choose to go with – this pattern could run the gamut from structured to soft.
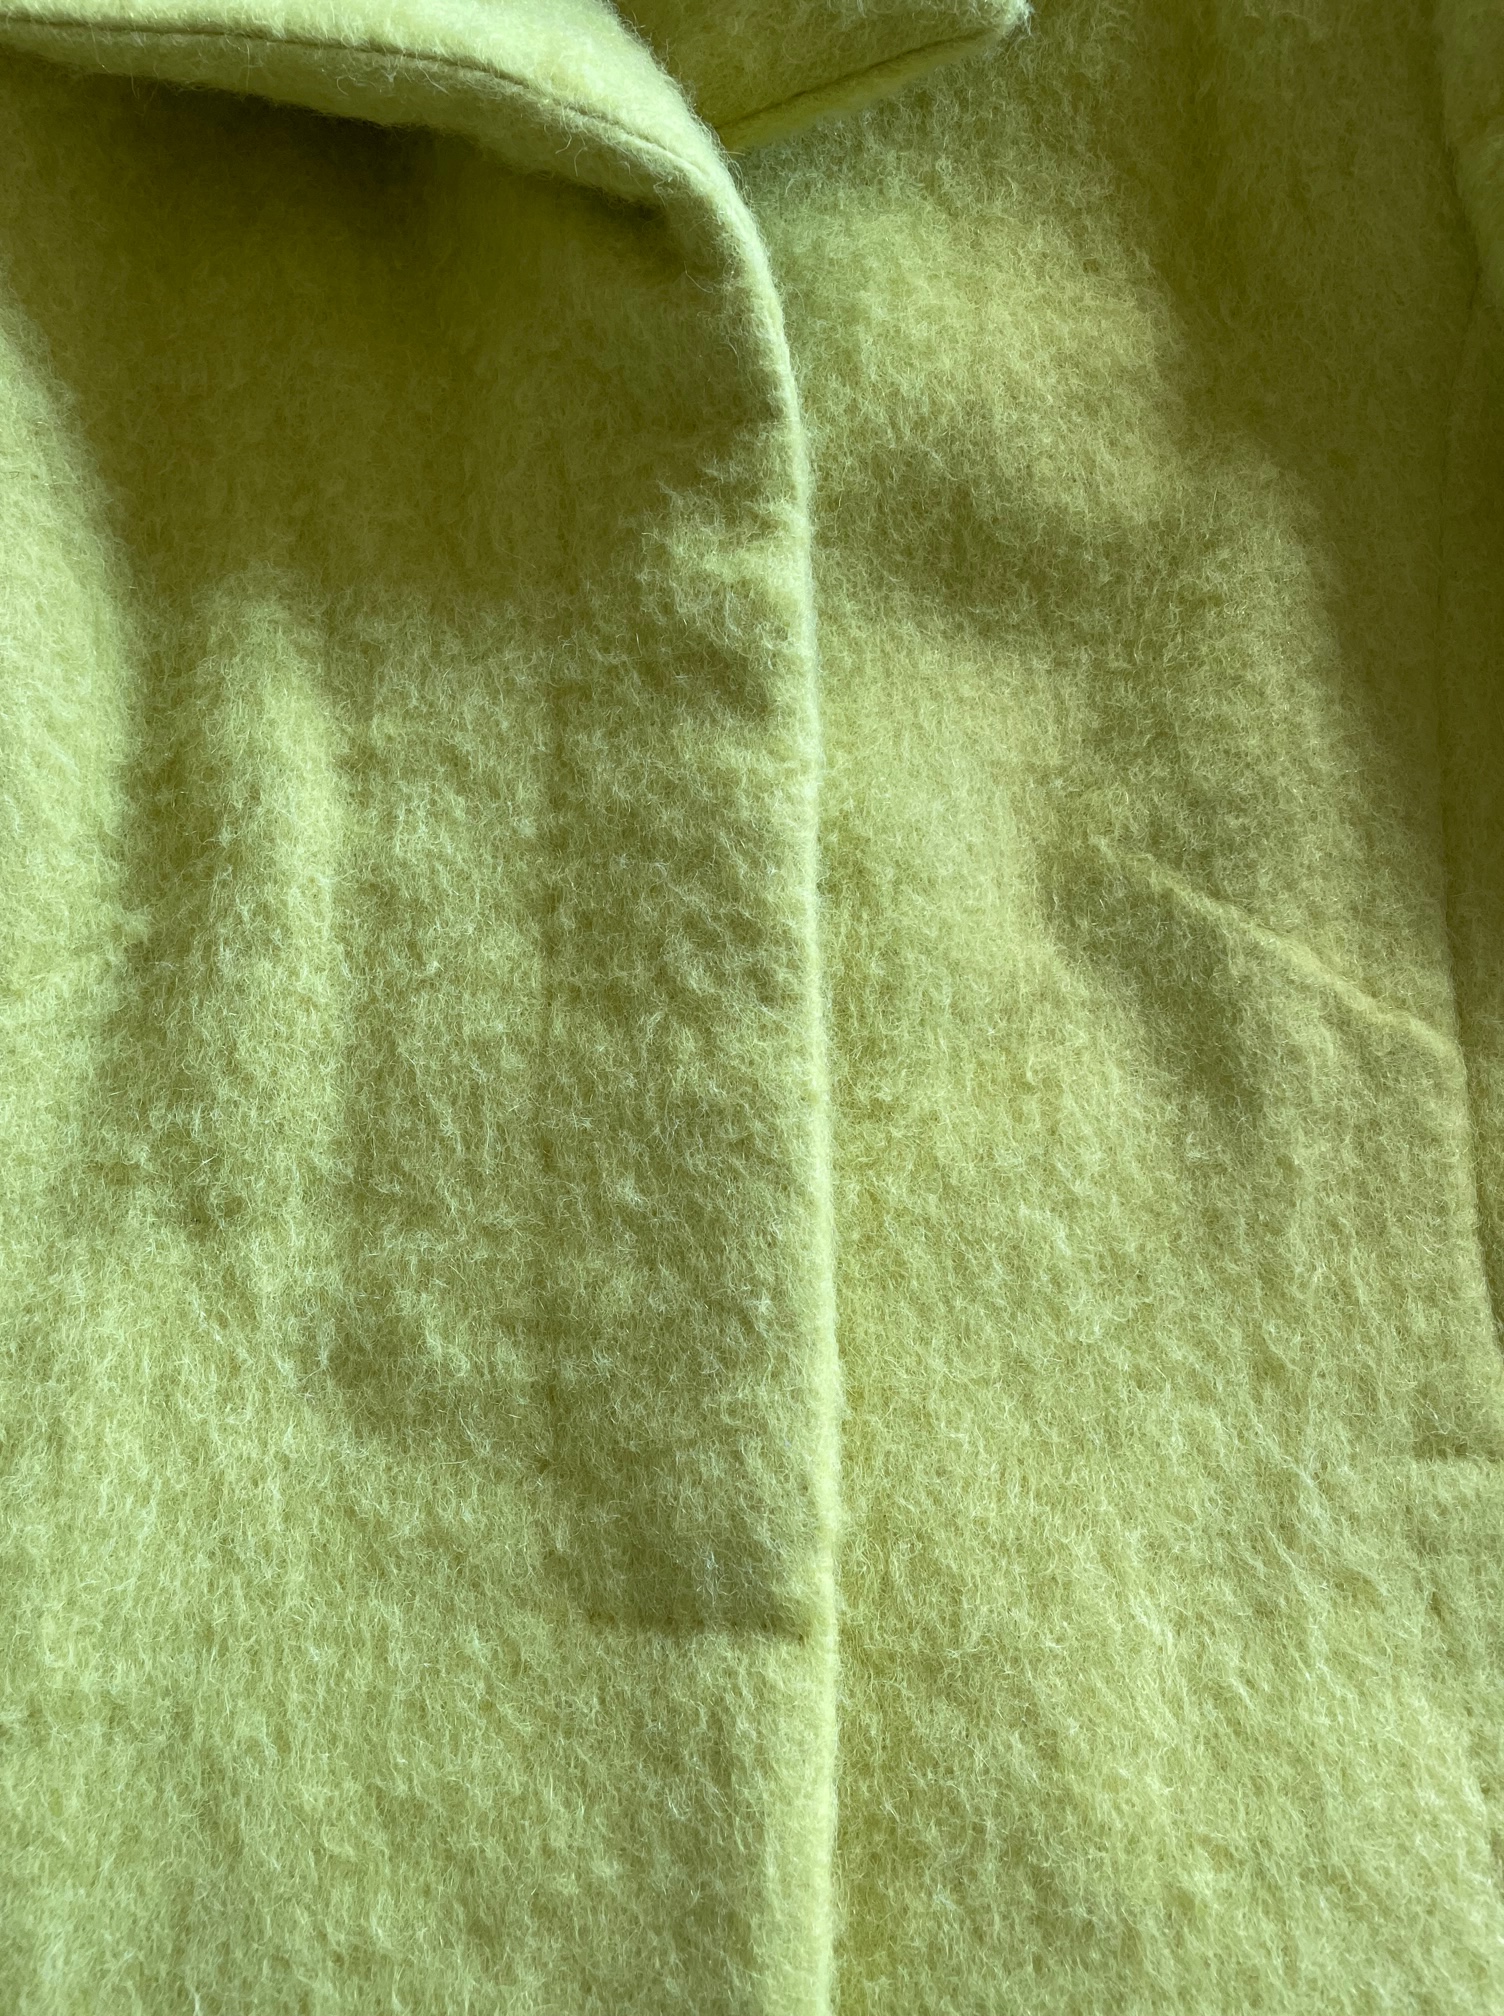
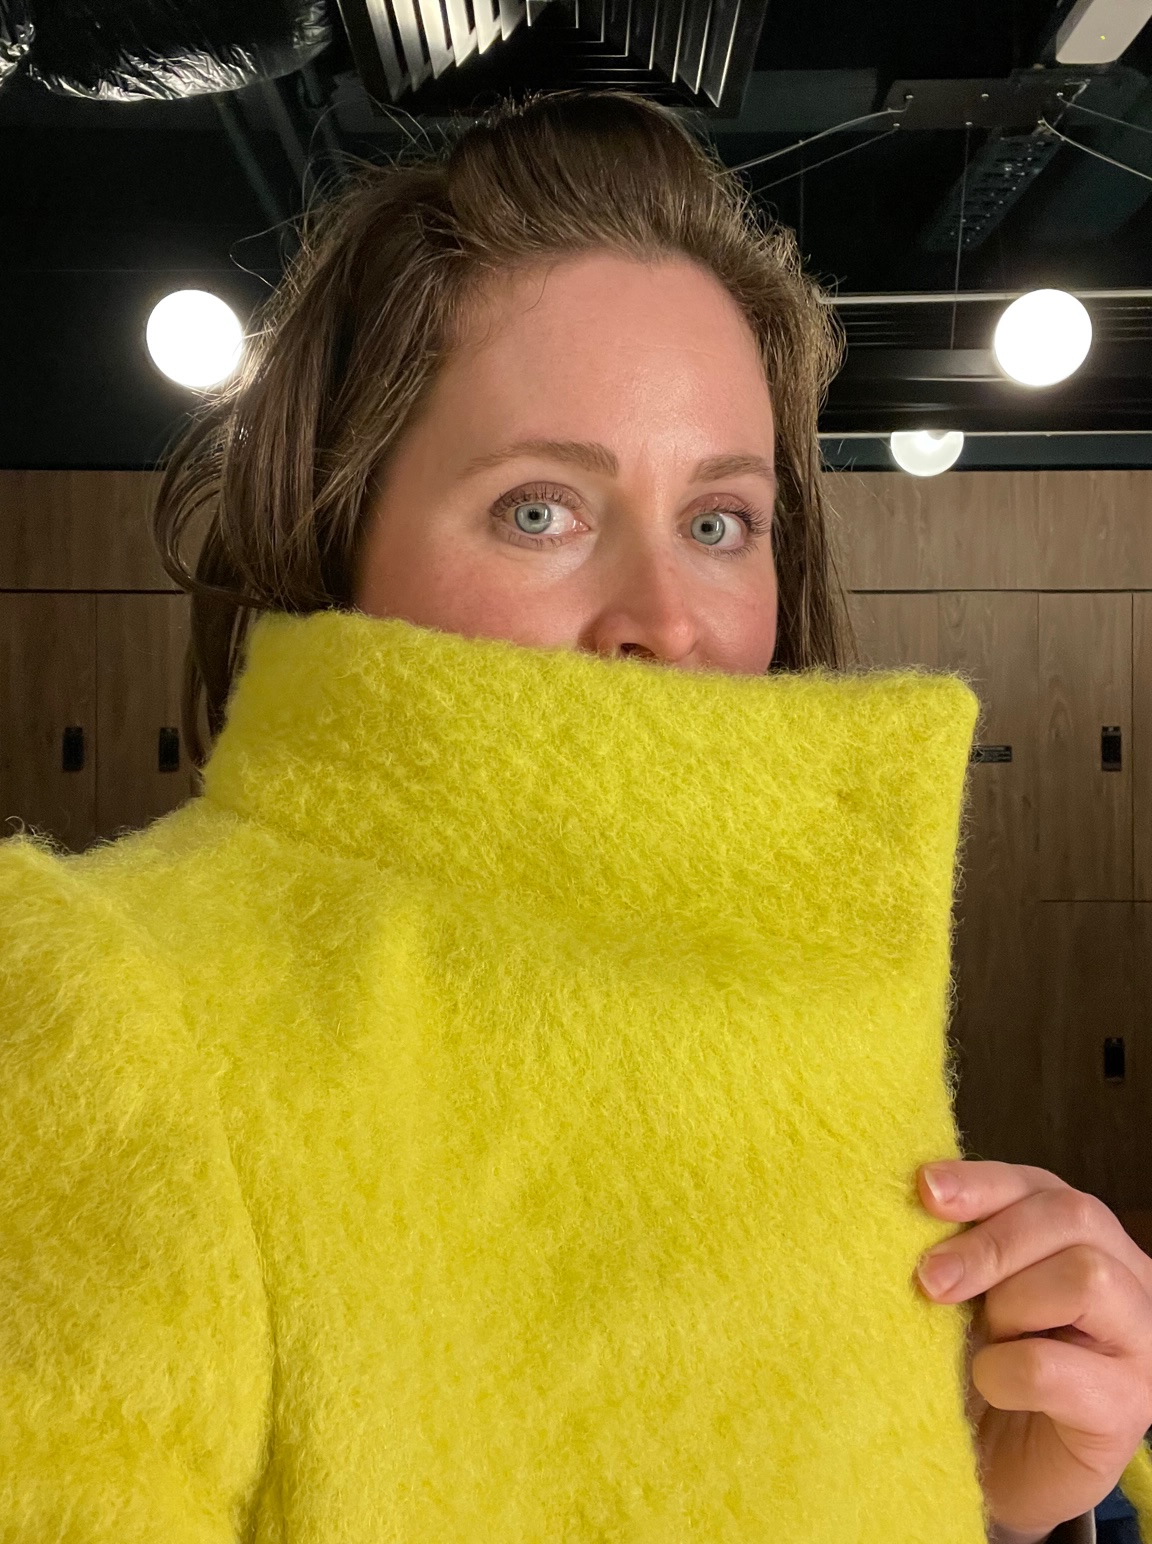
For fabric I went with an acid yellow wool and mohair blend, from Tessuti Fabrics. It’s very bright, fuzzy, and is the first time I’ve sewn with fabric that has a ‘nap’. Marfy recommends 2.9m of 140cm wide fabric – I used exactly this on fabric that was 155cm wide. Whilst I’ve always found Marfy’s length recommendations to be very accurate, I suspect that the nap of my fabric (limiting the way I placed the pieces) impacted this. Or – also likely – I just didn’t expend the brain power/time on really getting an efficient layout.

I started out in late June 2022 on a week-long sewing ‘holiday’ (with a group of ladies who also love all things couture sewing) with a muslin – which honestly took me three days to trace, cut, sew and fit. Kicking my brain into this gear was like wading through knee-deep mud. I recognised the process as being familiar, but every effort was an effort…
At the end of Day 3 I was quite downtrodden about it all. Fitting truly is the hard part – it’s no wonder newbies feel so intimidated about this aspect. Eventually I landed on the two adjustments I’ve always needed to make – additional boob room (achieved via expanding the side princess seam, and lowering the Dior dart) and additional height to the sleeve cap. Which intrigued me given I was probably 15kg’s up for weight compared to the last time I tried to make a Marfy coat pattern. Oh, and two adjustments specific to this pattern – I made the pocket bags much wider and deeper, and I lowered the height of the funnel collar by 1.5cm (one is not in possession of the longest of necks). I did also play around with adding width across the back, but reneged on this for the final muslin fit.
One of the ladies I was sewing with brought along her personal button collection – and pulled out this stunning blue and yellow glass button, that just pinged off the acid yellow perfectly. She was kind enough to let me buy it from her – thank you Ros!

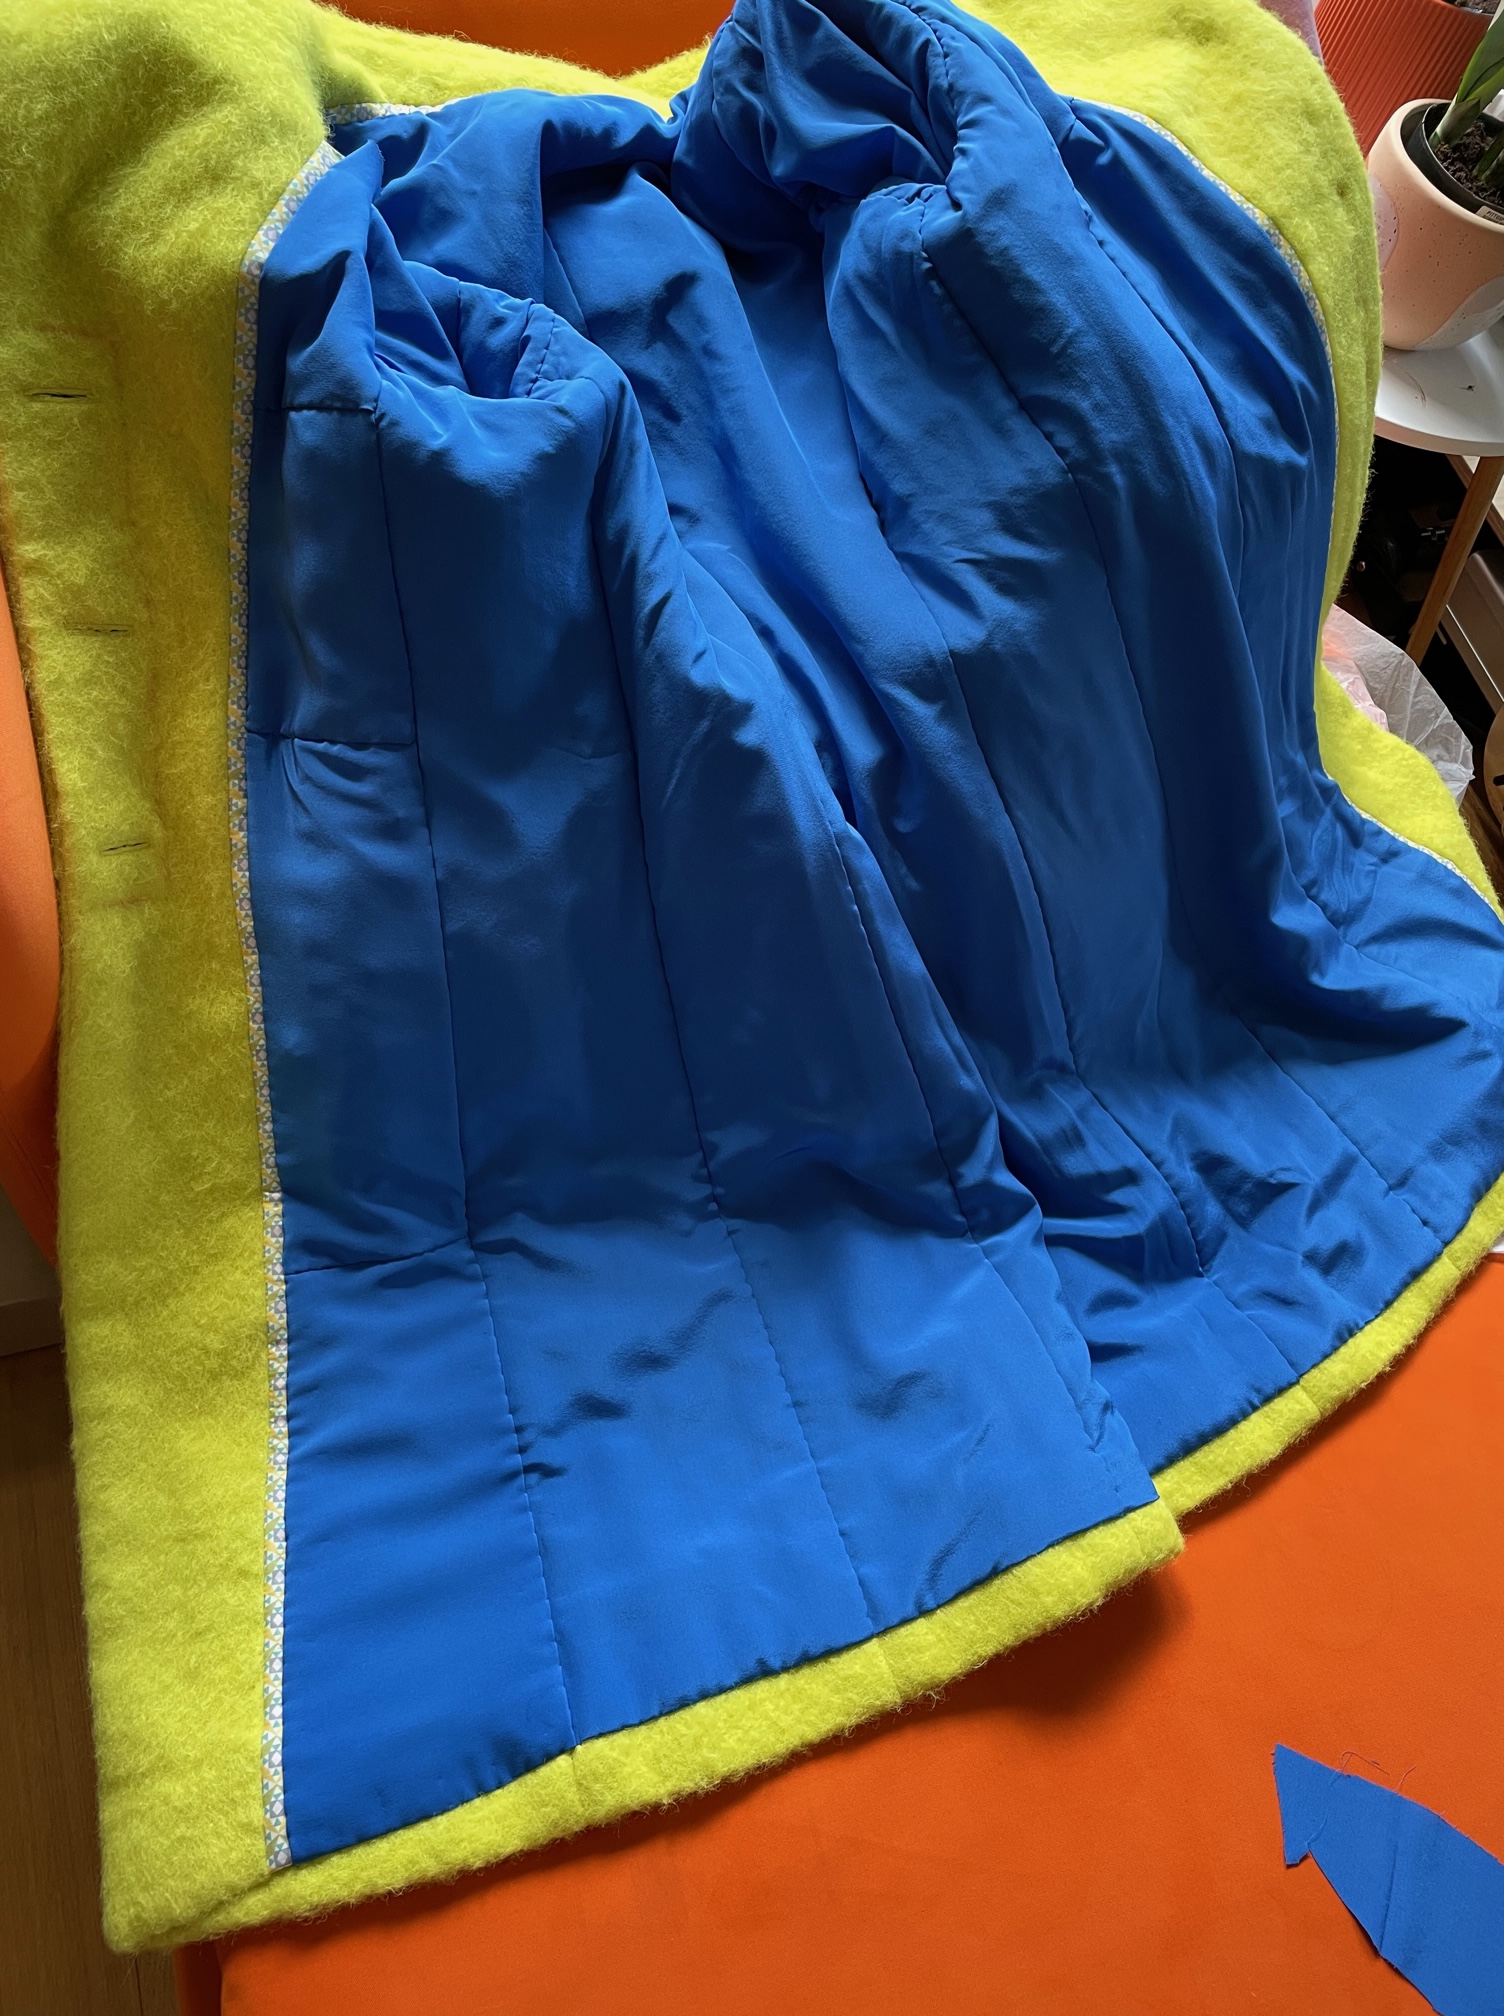
On Day 4 and 5 of working on this coat – I traced out the adjusted pattern onto silk organza underlining, cut out the crazily bright fabric, and got to thread tracing all the pieces. Day 4 I nipped out to buy lining fabric – which always takes longer than you think it should! – because I needed it for the pocket bags. Inspired by the button, I went with a Royal Blue silk satin for the lining, from The Fabric Store. I bought 2m of lining fabric (it was the end of the roll!) and I vaguely acknowledged the challenge that this 114cm wide remnant was going to pose, but waved it away as tomorrow’s problem.
Marfy patterns don’t include the lining pieces, so I drafted a lining facing piece and used the outer pattern pieces as lining pieces.
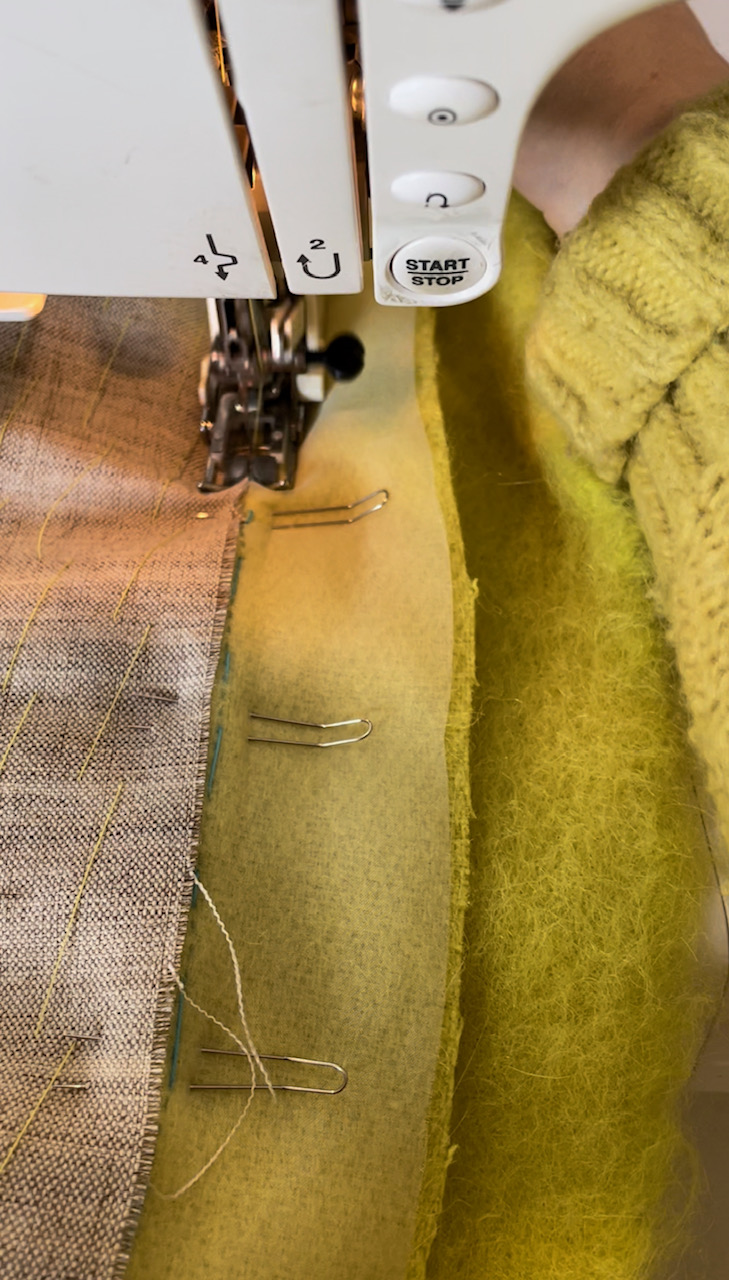
On Day 5, I sewed a mock-up of how I wanted to incorporate a hidden button placket at the front – this was following an article in a 2004 Threads magazine that another of the ladies I was sewing with brought in especially for me (thanks Janet!). This was a particularly useful method as I wouldn’t have been able to do this the way you would on a button-up shirt simply (a la this particular Threads article) because of the bulk generated by the wool/mohair.


It inserts two layers of lining fabric in between the front and the front facing pattern piece – allowing you to make buttonholes on the facing pattern piece only, with the front pattern piece hiding the connection. It does require some topstitching – which the pockets have also. It’s a fabulous treatment!
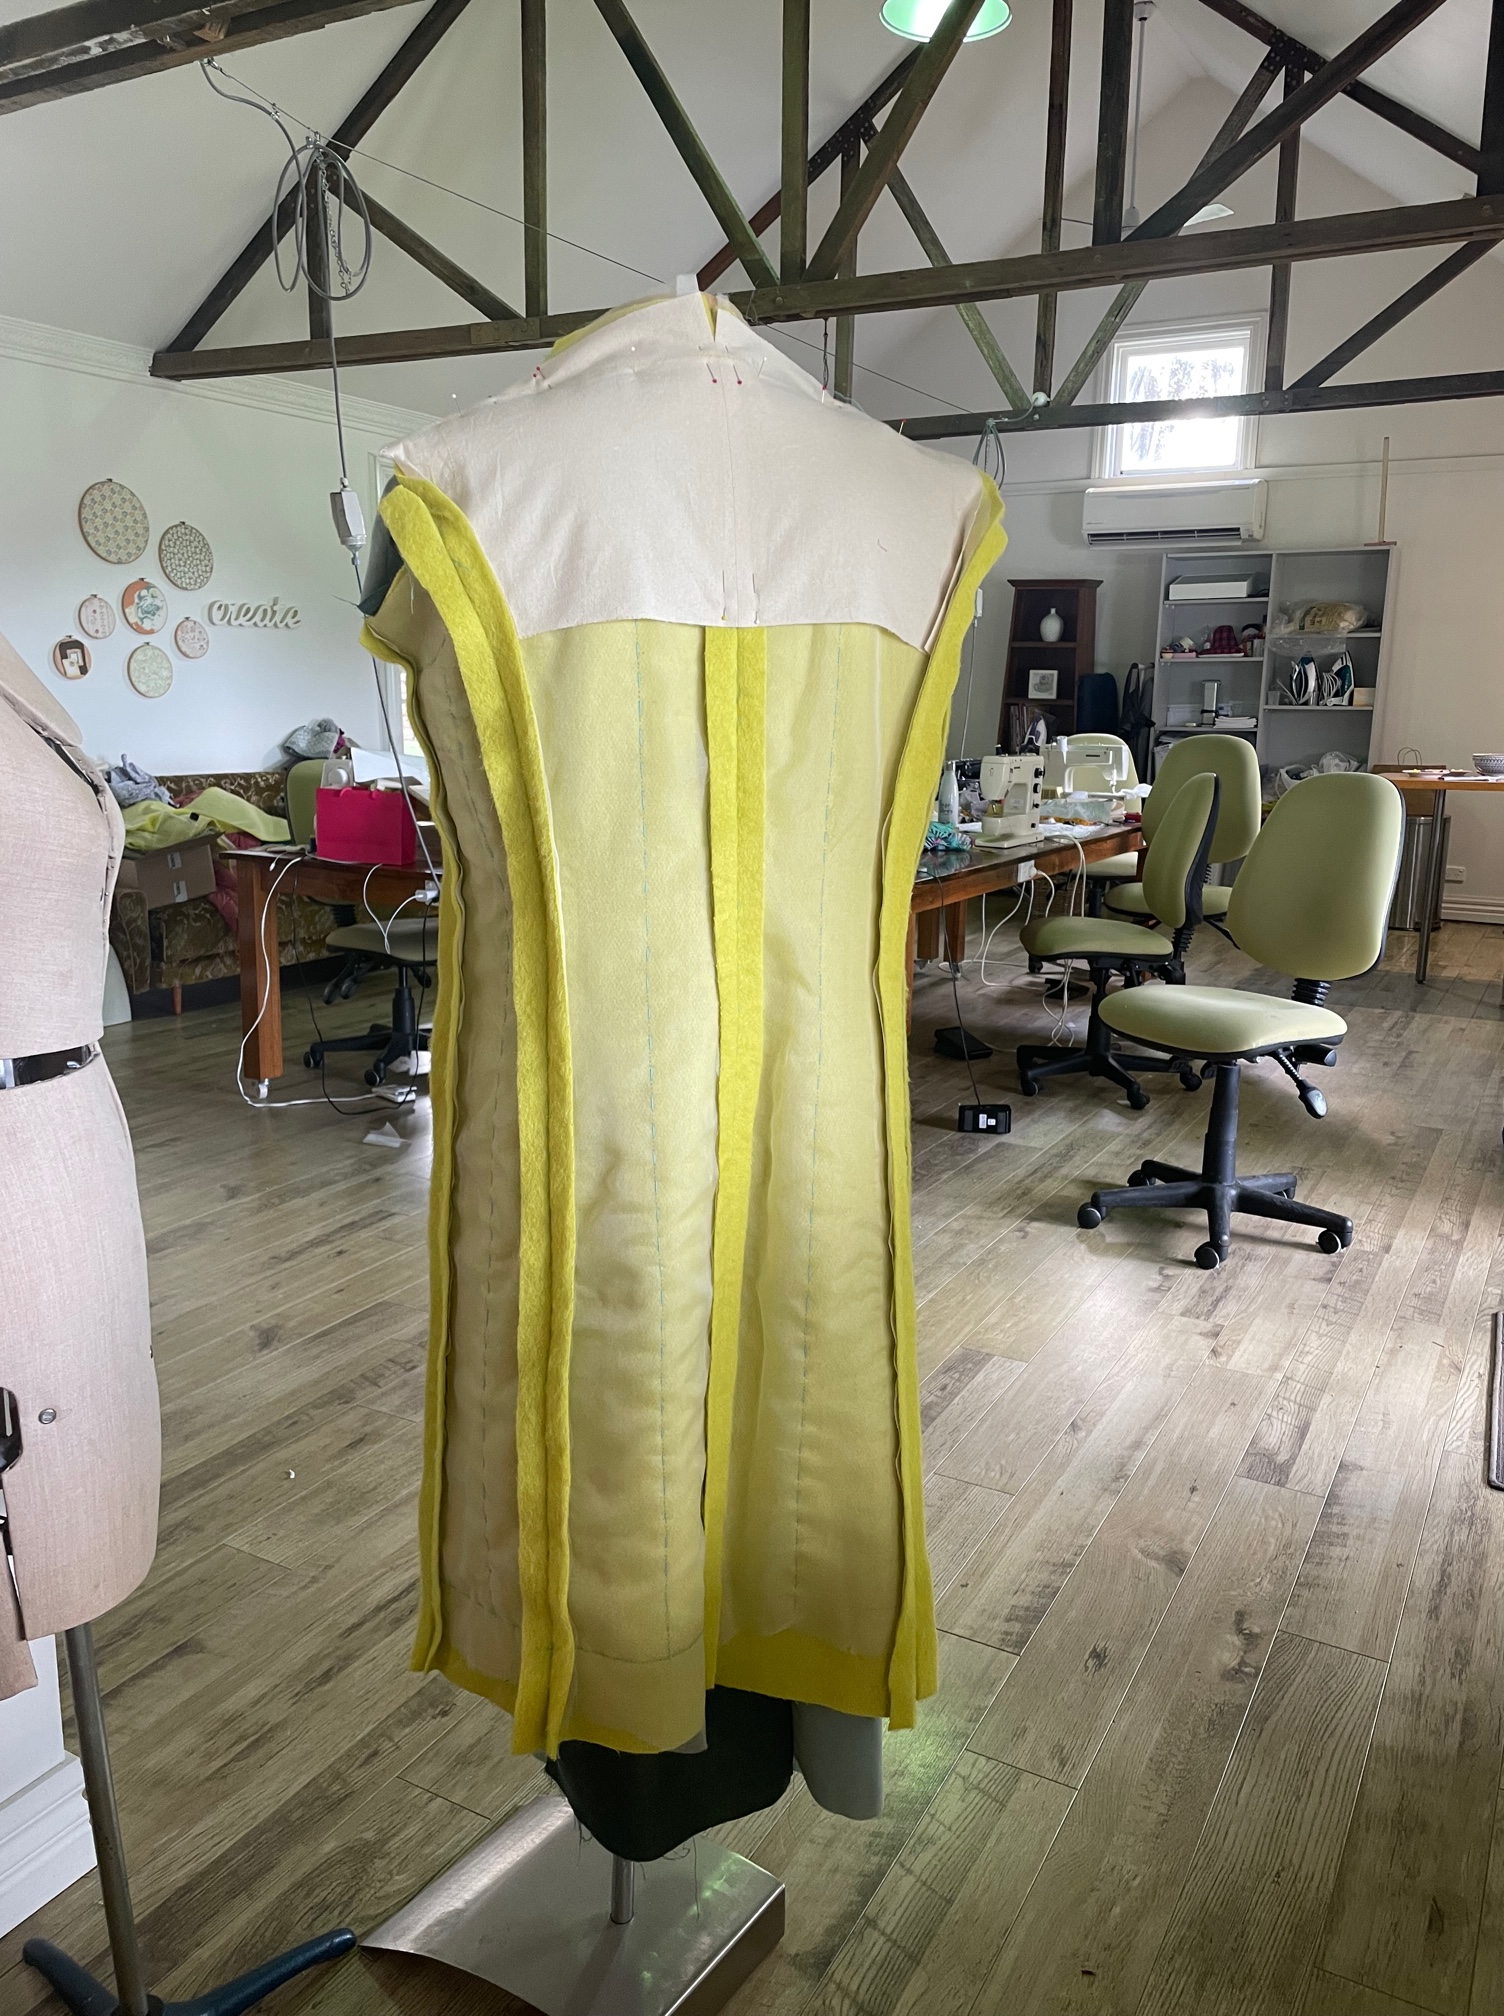
By Day 7 I had the all the external-facing pieces cutout in both organza and the outer fabric, and thread tracing commenced. That was the end of my week long sewing holiday, and the coat and box of supplies were popped in the spare room… awaiting such time as I was able to sew again!
I then had three weekends away with sewing friends to keep working on this – June was with my sewing buddies at Sewjourn (2.5 days of cutting out the facing pieces and sleeves, thread tracing and starting some pad stitching of canvas onto the facings. And one sleeve attached!).
July was 2 days with the Brisbane Spoolette’s in Maroochydoor (second sleeve attached, finishing pad stitching, and catch stitching seam allowances down).
August was 2 days at Mill Rose cottage in Ballan – THAT button placket installed between the coat front and facing – button holes sewn and cut – and lining cut out.


Which is where I realised I was going to be short on lining fabric. – by one lining facing piece.
Ever the optimist (or is it just delaying having to decide what to do?!?) – I decided to press on and figure it out at the end. I hand sewed in the lining, mostly because I enjoy doing this and second because I like the way it looks. I started this whilst at Mill Rose cottage, and completed it in small chunks late at night and on weekends in the weeks following. I used a small slither of Liberty Tana lawn as the peep between the front facing and front lining. Not done in any kind of orthodox fashion, mind you – totally winged it.


This is where handsewing in the lining worked to my benefit – I was able to use the small scraps to build up the other front facing piece. It looks a little patchy, but at least is all matchy!

And then my coat was finished. Many thanks to the ladies at Buttonmania who did a stellar job at creating my fabric covered buttons. I needn’t have worried about the self-covered buttons being too thick – they’re perfect. I did order a few extra’s, as one of the ladies from my couture group pointed out that over time – self-covered fabric buttons tend to wear/discolour at a much higher rate, and that this becomes visible quite quickly. I hadn’t considered that as a longevity issue before.


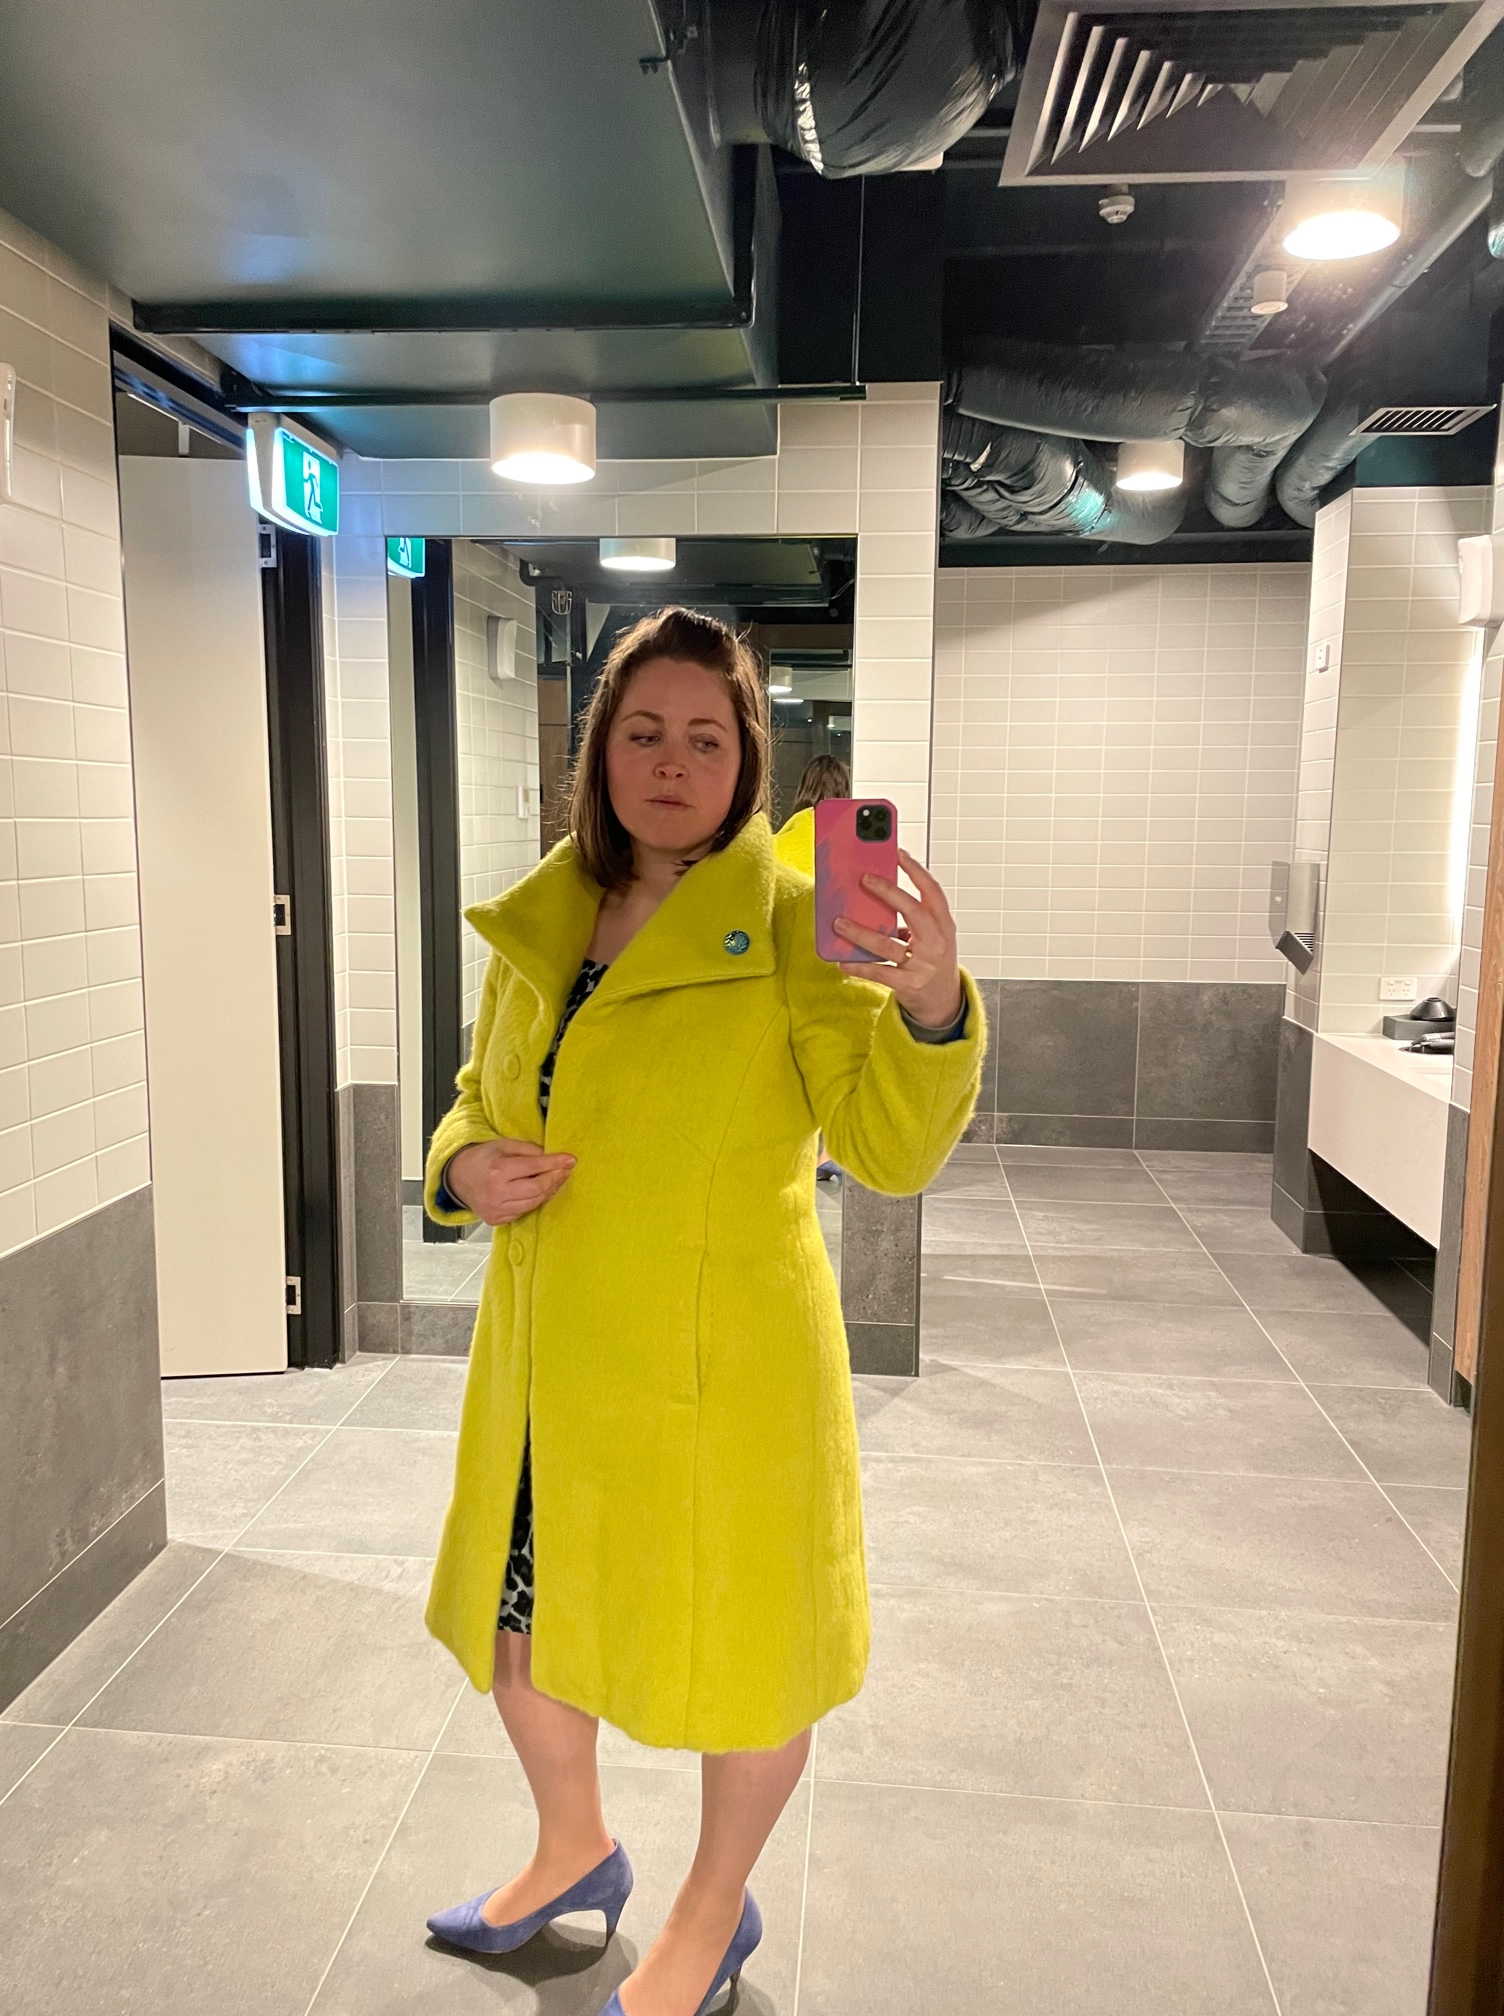

Location: the end of trip facilities at my workplace, where passable lighting and full length mirrors collide.
I’m very happy with the pattern – I would make this one again (were it not for all the other coat patterns in my collection vying for attention!). I ended up moving the Dior darts on this version down a little too far – I’d move them up more should I make a second iteration. Obviously I went with the more structured internals approach (as opposed to a softer, more cardigan style) – I’d thought to wear this predominantly with the collar up on one side and other side down (to show off that button) but it also lends itself to having both collars naturally fall out. I rather like the anti-gravity way they do this – holding their own weight up mid air. Makes me feel très dramatique. I do think there was something amiss with the way I handled the internal front facing piece, especially with how/where it connects to the outer coat around the cut-on collar/shoulder point. But it doesn’t appear to look odd from the outside so I’m not overly fussed.
As for other sewing projects this year – I’ve also finished a shirt dress with a full circle skirt, which I hope to post about soonish. So that makes two finished projects for the year – which I’m quite proud of. Next up is the fun part – planning what to sew next!

It’s gorgeous!!! Fabulous couture-ing.
Thanks you, my dear x
This coat is gorgeous, Mel! Wow, you did a beautiful job on it, and the front concealed opening is such a fabulous addition. I love everything about it and especially how it looks on you. One can never have too many coats….
Completely agree, Karen! I have so many more coat plans to action. Or shift dresses for that matter ;) Thank you!
It’s good to see you post again! Congrats on your growing family. It is difficult to get making when so much headspace is needed for work and family, but it gets easier 😀. The fitting alterations worked to give a great fit and a lovely finish. I’ve just finished a coat for my Mother, and used a different colour lining for the sleeves since I didn’t have enough of either colour!
When my girls were tiny, I couldn’t sew more than a dress or two for them with the time available, I just wasn’t up to trying to fit the new body. To tackle such a great coat has got to feel wonderful, especially when it looks just fantastic on! Congrats Mel!
Absolutely love your posts! You create such beautiful pieces. Inspirational! Never stop.
what a great project, I love a statement coat so much. And that color is difficult but on you it looks great. the pattern also has potential as a jacket.
Wonderful site. Well done. You are an inspiration.
Beautiful coat. I love the colour. It’s great to see you back.
What a great make! Love that you were able to make it at so many Sewing Weekends… lots of memories to go with the finished product :)
Work of art, really! And I can feel all the joy that went into making this beautiful coat.
Welcome back. Young children plus work doesn’t leave much time for sewing. Beautiful job; Marfy has such great designs.
Gosh this is sublime. I really love a vivid coat (probably because I always chicken out and go for neutrals when it’s mine) and this is a great fabric/pattern contrast. I hope sewing is helping you find the space to be you, and that your family are able to support you to devote a chunk of time to it when you need that space.
So nice to hear from you again. Congratulations on achieving time to sew with small children at home. Your coat is lovely and such a happy color!
What an amazing coat. You look lovely in it—great to see a blog post from you. I just love your Marfy creations. Such a a happy colour. Abbey
Sorry to hear about your difficulties over the last couple of years. It looks like sewing is helping you through. What a fabulous coat. All the attention to details. And inbuilt memories of making it with friends 👏👏
Congratulations on a beautiful coat! I love your colour choices 💛💙
Stunning! A perfect mix of pattern and fabrics. The colors are fantastic!
This is exactly what I was looking for. Thanks for sharing!