

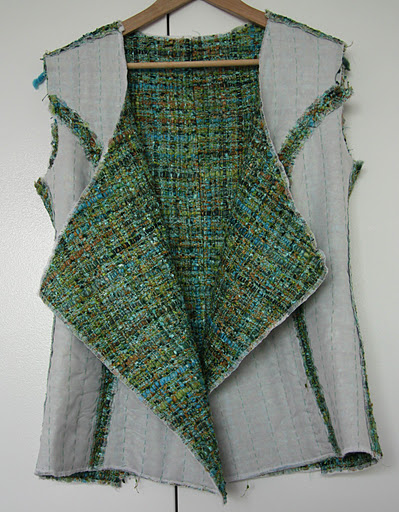
Once all my pattern pieces were interfaced, underlined and overlocked, I basted them together with a long stitch (easier to un-pick my dears!) to check the fit before joining them together with a permanent, normal size stitch. Above is the end result, ready for the sleeves, collar and the lining!
After deciding that the first official fitting was as per my expectations, there’s a few finer details that need attention when it comes to finalising the seams…
I love patterns with princess seams as they allow you to get such a great fit. Definitely a little tricky the first time around, I find it useful to pin at the pattern matching points first and then at each of the ends, then pinning out the rest in the middle. This way you minimise any chance of your fabric being pulled or stretched out of shape, as a portion of the fabric is cut on the bias.
But my best tip would be to take it slowly (put your machine speed on the lowest setting – it’s harder to make mistakes when things are moving at snails pace!), pin carefully and check as you sew to make sure you don’t get any unwanted puckers.
Once you’ve sewn your princess seams, it’s important to notch and clip:
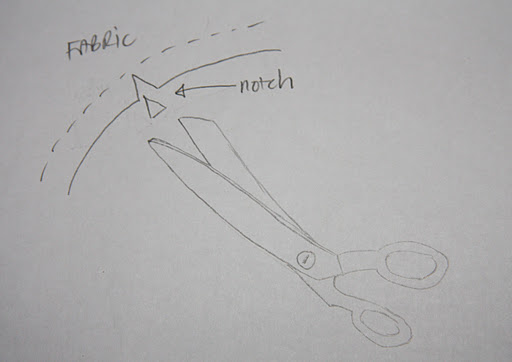
NOTCH: Where your seam allowance forms an ‘inner curve’ when it is ironed back against your shell fabric. Here you cut out a ‘V’ shaped bit of fabric – this is so that your seam allowance doesn’t overlap and create unwanted bulk.

CLIP: Where the seam allowance forms an ‘outer curve’ – make a single cut that ends close to your seam line.
Where the seam allowance forms an outer curve and clip an outer curve (so your seam allowance can ‘stretch’ out flat).
You can see from the princess seams on my jacket where the notches and clips go – all around the curvier parts of the seam line:

Catch Stitching
Catch stitching the seam allowances down to the silk organza underlining stops them from flapping about under the lining creating unwanted bulk – keeping the fabric layers nice and flat.
Once you’ve sewed your seams, press them flat, and thread your needle!
Working from left to right along the seam, with your needle always pointing to the left alternating between the seam allowance and the shell fabric, you end up with a thread pattern like this:
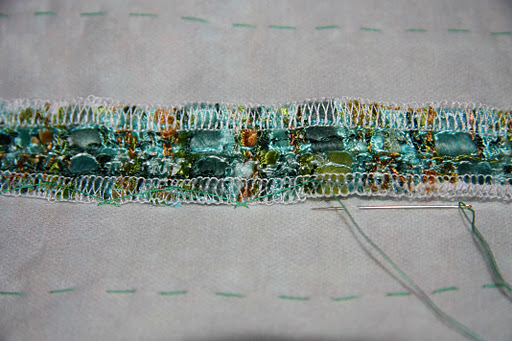
The notching, clipping and catch-stitching allow all the seam allowances in your jacket to lay flat up against your shell fabric, making the lining look visually smooth and keeping everything in place.
YAVFZ3AEDE2N
