


Following on from my previous post (101: Installing an invisible zip), we still need to finish off the seam at the top of the zip. This is done either with a facing, or a lining.
1. Before installing my invisible zip I had already attached my lining, stopping about 4cm away from each zip half. I do this so that I know the both the fabric and lining/facing are in alignment with each other:

If you choose not to do this, with the right sides of your fabric facing each other – pin your lining or facing to your fabric.
2. Fold each edge of your lining/facing back so you have a 0.5 to 1cm gap between the lining/facing fold and the zipper teeth:

I then pin to secure the folds.
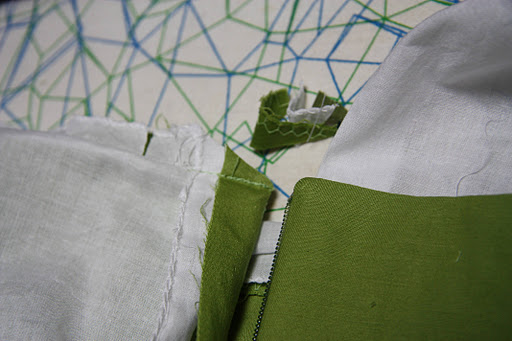
3. The next step is to fold the edge of your fabric where your zipper is attached over and onto the folded lining/facing, pining to secure (remove the pins from the lining if you’ve pinned them down like I did in Step 2). The zip seam should be on the edge of the fold:
4. Continue sewing your lining/facing from where you left off, sewing right over the folded fabric and back stitching:

5. Take out your pins, turn outside in, do up the zip and make sure you’ve got the two seams level with each other:
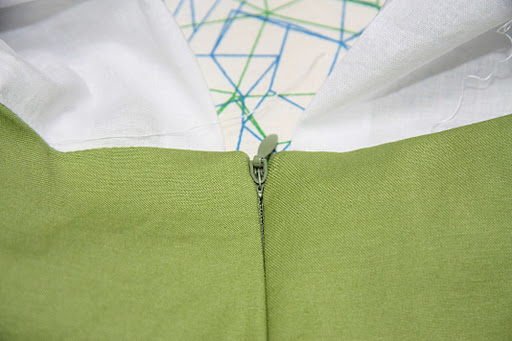
If not, you can turn them back inside out and reduce the longer side by sewing a little lower down. Once you’re happy with the match, trim the seam allowance off on an angle so you get a sharper corner:
If you are planning to under stitch, now would be a great time to do so, although obviously you won’t be able to get right to the zipper edge.
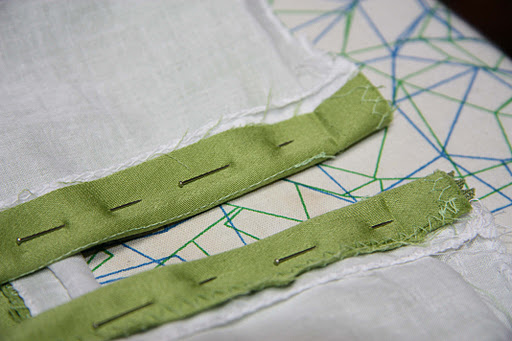
6. Now we can turn our attentions to the lining/facing! If you’re using a facing, you’ll need to hand stitch this down to your zipper and seam allowance. If you’re using a lining, turn your garment over and pin your lining to the zipper very close to the edge, making sure you leave a good 0.5 to 1cm distance from the zipper teeth (which ever you used in step 2):
These pins are just a guide, so turn your fabric outside in and pin to the zip and seam allowance only (making sure you don’t pin to your fabric):
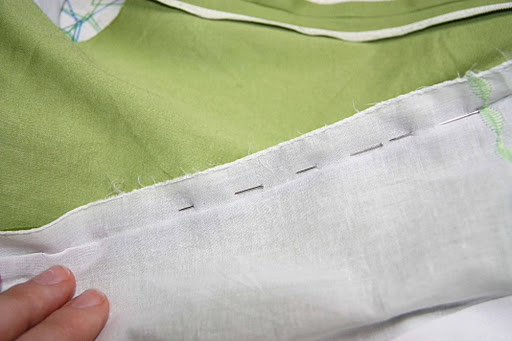
I take the pins from the right side out as I go, you can see I’ve still got one on the right side of the garment just near my finger.
7. I’m using the normal straight stitch foot with its edge pressed up against the zipper feet, and the needle moved over to the left.

It’s simply a matter of sewing your lining to the zip and seam allowance, but you won’t be able to get it right to the top – nothing that can’t be solved with a little hand sewing!
Once you’ve hand sewn up the gap at the top, you’re all done :)

I will be filing this tutorial away in my 'hands-on' file, and will recommend it to anyone I come across. Your fabric choice and precise detailing of each stage was brilliant. So, are you planning any further tutorials after this success???
Thanks Doobee, glad it will be of use to you! Absolutely there will be more tutorials… if I'm sewing and it looks like a step could be generically applied to other garments, then I'll probably do one. Learning how to do this particular one was pivotal for me!
There is an easier way of doing this, with no hand sewing, but I can't find the tutorial where I learnt it anywhere right now. Maybe I'll have to write my own as I have two skirts in the queue that use invis zips and are to be lined.
Really? I'd totally love to see it! Please do :)