

Invisible zips are a fabulous invention! I always buy zips a good 5 or 10cm longer than the pattern calls for – the reason for which will be shown below, along with the techniques I use to get a RTW finish:
1. Pin your zip to the right side of your fabric, with the teeth of the zip being 1.5cm (or whatever your seam allowance is) from the fabric edge:
The little plastic nubs at the top of the zip? They’re your indicator on how far down to position the zip from the seam at the top – 1.5cm (my seam allowance) down in this case
2. I then baste the zip to the fabric so that the pins can be removed. This is an additional step that allows you to get a very straight stitching line on your zip.
When sewing invisible zips, you are almost applying a side-ways force on your zip in order to get the stitching line as close to the zip teeth as possible – having it basted means the zip is wholly secured, whereas the pins allow the unpinned parts to move and pucker, giving you a wobbly looking zip!
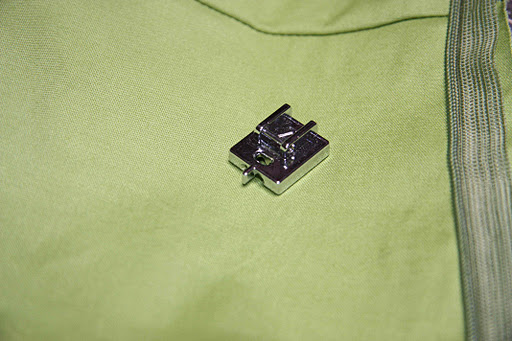
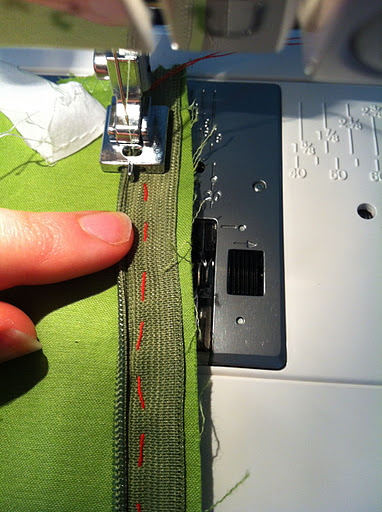
3. You’ll need a special invisible zipper foot for your machine – the one for my Janome has a hole through which the needle goes, two slots through which the teeth of the zip sit (depending on whether your sewing to the right or the left of the zipper’s teeth) and a pointy bit at the front which moves the zipper’s teeth into the right direction:
Some people like to iron their zipper teeth away flat and from the zipper fabric:
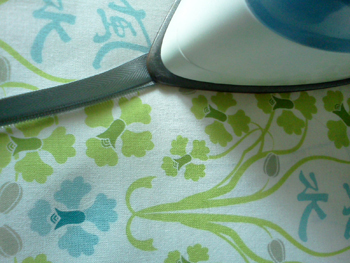
I find this isn’t for me – the first time I tried I did too good a job and ended up sewing my seam over the teeth and being unable to do up the zip! I prefer just to fiddle with the teeth to get them in the upright position when aligning the fabric, like so:
I have noticed that in many of the online invisible zip tutorials, those that are recommending ironing their zips are the ones using the white plastic ‘generic’ invisible zipper foot. If you’re unsure about which method to try, I would highly recommend practising on some scraps and comparing your end result. It’s all about what works best for you and what gives a result that you’re happy with!
4. Now we can start sewing! Reverse stitch to secure it, then sew down until you reach your stop point. You can now see why having a slightly longer zip is a good thing – the zipper foot can’t go all the way to the end! Had I used the same length zip as suggested by the pattern, I would have ended up with a zip shorter than necessary:

Unless of course, you sew it by hand…
5. Repeat steps 1 through 4 for the zip on the other side of the fabric. I always test the zip first before basting though as I’ve made a bad habit of basting then realised I’ve got the darned thing on with the teeth facing the wrong direction, or on the wrong side of the fabric….
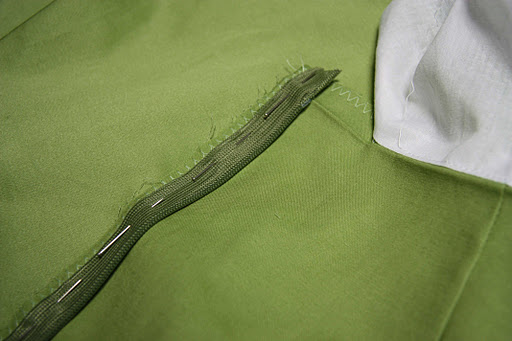
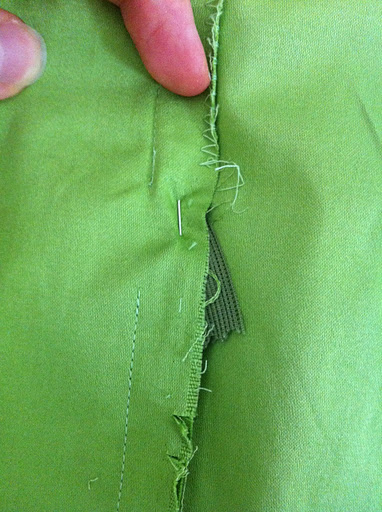
6. If your zip goes over a seam (like here, where my zip goes past the seam joining the bodice to the skirt) and you want to make sure you get this nicely matched, you can put a tiny little clip in the zip fabric on the first side:
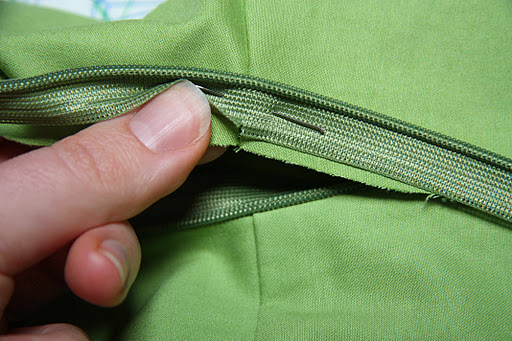
Then do up the zip, fold it over and put a clip in the other size of the zip’s fabric in the same place, then use this point to start pinning by matching the clip to the fabric seam:

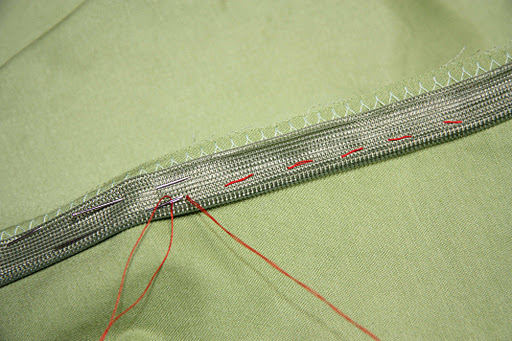
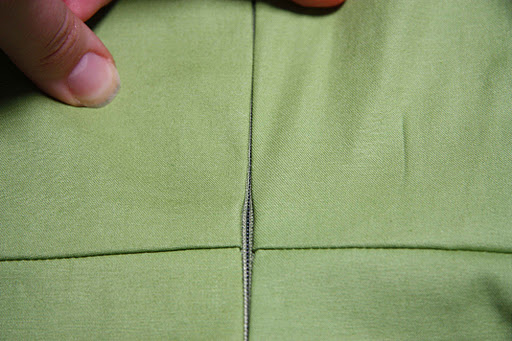
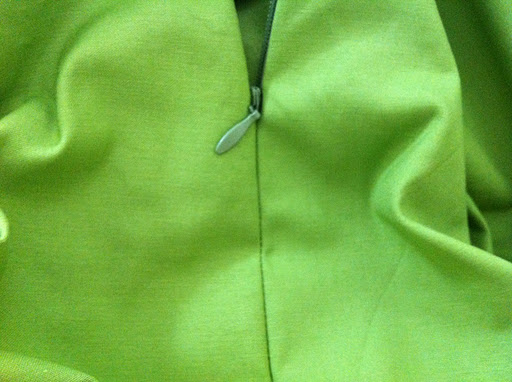
The result – perfectly matched seams:
Although like here, I often find that when sewing over seams, the thickness seems to prevent the foot from getting in nice and close, and I end up with this ‘gap’. It’s simply a matter of going over it again a bit closer. Fixed!
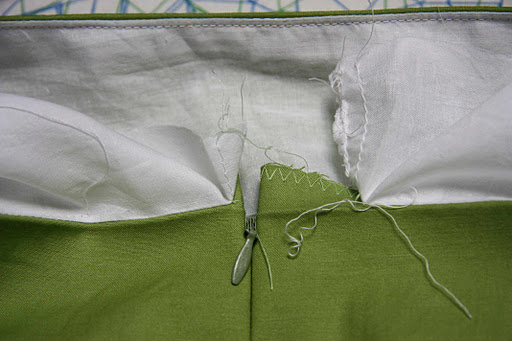
7. From a comfortable distance away from the zip, I sew my seam as per normal with the usual straight seam foot, backstitching at the start and finish. I pin the zip tail to the seam allowance so it doesn’t get in the way, but this still means you end up with a gap:
I like to use the rolled hem foot to sew this gap as you can get your machine’s needle right to the edge to sew up the gap:

A good pressing afterwards means any seam wonkiness (it’s pretty tough to get straight – kudos to you if you can manage it!) is not noticeable from the right side:
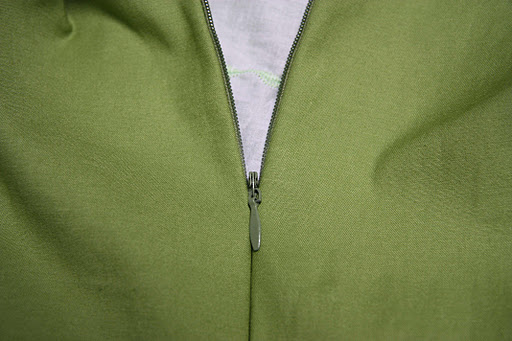
So your zip is all but installed, excepting the seam allowance at the top:
As the top of a zip usually meets either a facing or lining, I’ll be covering how to get a RTW finish on this in my next invisible zipper post. Ciao for now!

I've never had much luck with invisible zips, though they are supposed to be easy! So I will definitely be referring back to this post the next time I have to tackle one. Thanks:-)
I love invisible zips and always, always use them. Often I read how people don't have much success, and after reading your post I wonder if it is their foot – I have a Janome the exact same as yours and it has never failed me. But I did start out with a shonky 'no-brand' plastic foot that wiggled around all the time. Ditched that pretty quickly and paid out for the metal Janome one. Best investment ever!!! The basting is also the key for me, as is the 'not ironing' of the zipper. Looking forward to your next post tackling the lining…
$30 well spent, for sure! I'm rather suspicious of those generic plastic feet for invisible zips too…
Great tip! I'm going to have to do this for my next zipper!To answer your question, I'm using a spray starch called 'Mary Ellen's Best Press – The Clear Starch Alternative' It seemed to work well, although I'm going to look at other stabilizers as well, something that will work with silk. I'm not sure if this stuff does.
GREAT IDEA!!! to use the rolled hem foot to get closer to the seam. I’m going to try that, next time i need to close the bottom of an invisible zipper.
You ever finished the top of a lapped zipper installation???