

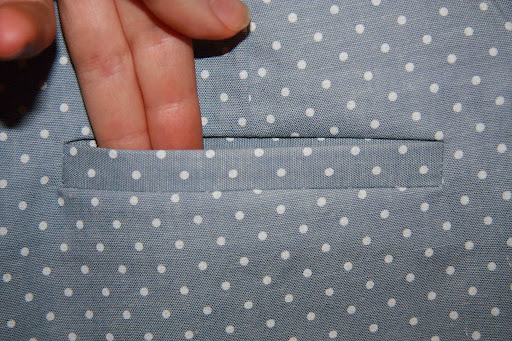
I made a pair of shorts to take on holiday with me (check them out here!) – and they have cute single welt pockets on the back. The pattern’s instructions for these pockets were pretty easy to understand – but the result left me cold. I went searching through my books and online sources – and after a few different attempts using calico scraps, I came up with a result I was happy with.
This 101 is a bit long winded purely because I found from all of the examples I could get my hands on they glossed over parts I wished they’d had more information on! Here’s how I did it:
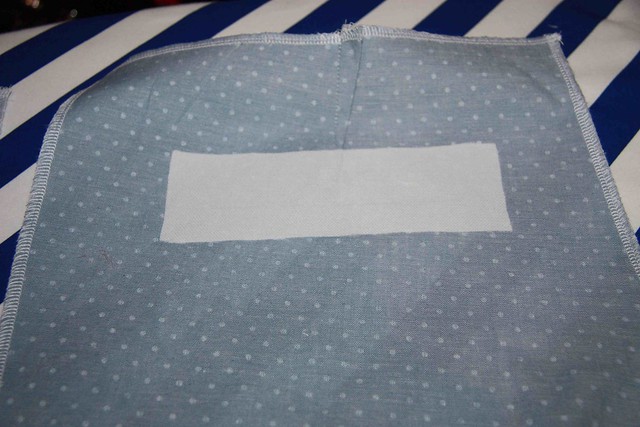
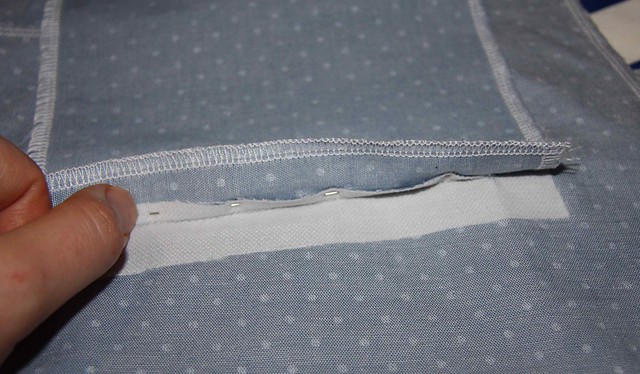
1. Apply your interfacing strip to the wrong side of your fabric, approximately centered over the location where your welt pocket will be.
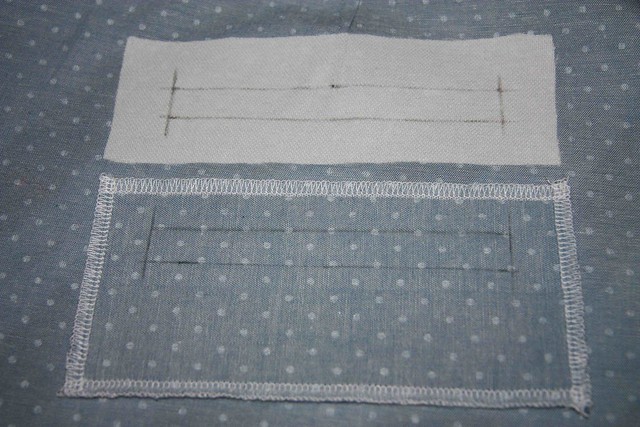
2. Grab your welt, and draw the height and width of the welt pocket you want to end up with on both the interfacing and the welt on the ‘wrong’ side of the fabric. Mine in this case is 12cm long and 1.7cm wide. On the welt piece I’ve drawn the rectangle in approximately the upper third of the welt – I’ll show you why further on.
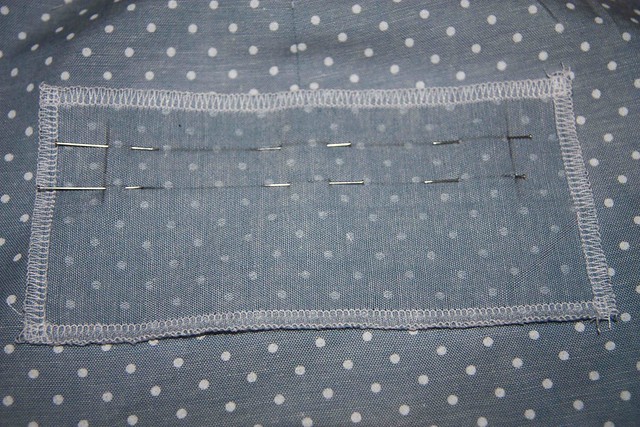
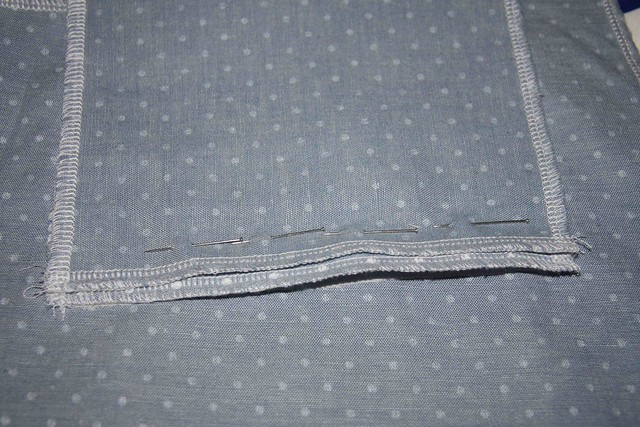
3. Pin the welt to the fabric, with the rights sides facing:
4. Sew along the upper and lower welt pocket lines in your shortest stitch – making sure your seam starts and stops exactly at the corner of the rectangle:
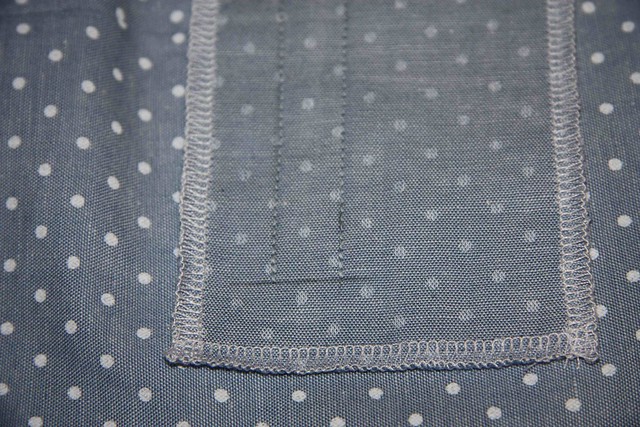
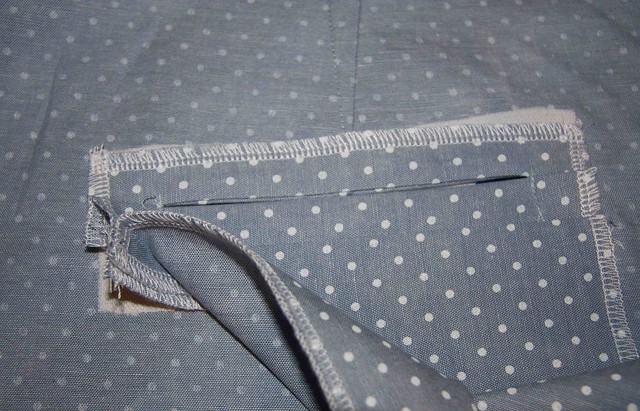
5. Take a sharp, pointy pair of scissors and cut a slit in the middle between the two seam lines just sewn:

Cutting through both layers of fabric (the garment and the welt piece), stop about 1.5-2cm short of each end to cut a fairly sizeable ‘Y’. Get as close to the corner and stitch line as you dare – the closer you get the better the end result:

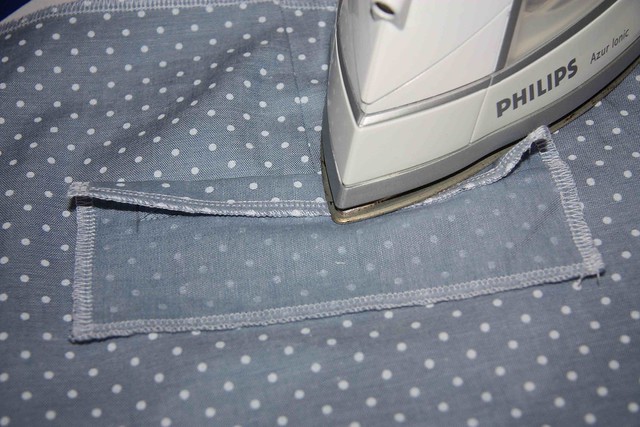
6. Grab your iron and press the welt upwards on the lower seam:

and then down on the upper seam:
7. Push the welt pocket through the cut you made in step 5:
8. Turn over so the ‘wrong’ side is facing up, and press the welt top and sides (not the bottom) so that the seam line is just on the inside fold:
Then underneath the unpressed welt bottom seam – press open the seam here (it reduces bulk for the steps a bit further on):

9. Taking the larger portion of the welt that is underneath the lower seam – fold this up so that the fold meets the top of the welt pocket and press flat:

Drawing the welt’s rectangular outline in the top third of the welt piece allows us to make the welt out of a single piece of fabric, rather than making a window (similar to than in a bound button hole) and then using another fabric piece to make the welt. It will now look approximately like this from the front:
10. With the right side facing you like in the photo above, fold over the side to expose the welt pocket piece and the little interfaced triangle. Sew down and across the triangle – staying close to the original line you drew:

Then repeat on the other side.
11. Nearly there! Now we’ve finished the welt, it’s time to attach the pocket. This also helps to ‘stabilise’ the welt to minimise any sag. With the right side of the pocket facing down, line up the edge with the bottom of the welt. I’ve placed mine a bit higher so you can see the welt underneath:
Pin in place, making sure you include the bottom half of the pressed-open seam underneath. Then sew across all of this:
12. Iron the pocket bag back down:
13. I’ve cut my pocket bag long enough allowing me to fold it up so the other end aligns with the waist-band seam of the garment. This also helps to stabilise the welt and pocket bag.

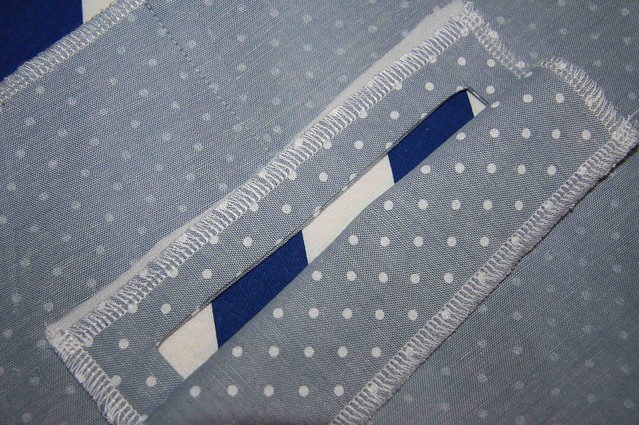
14. Pin the pocket bag to the welt fabric, but not the garment fabric. Sew first to the top of the welt, making sure you include the trapezium-shaped interfaced fabric:

Then sew down the sides of the pocket bag:

When you sew on the waistband (or lining) the top of the pocket bag will be included in this seam, supporting both the pocket and the welt.
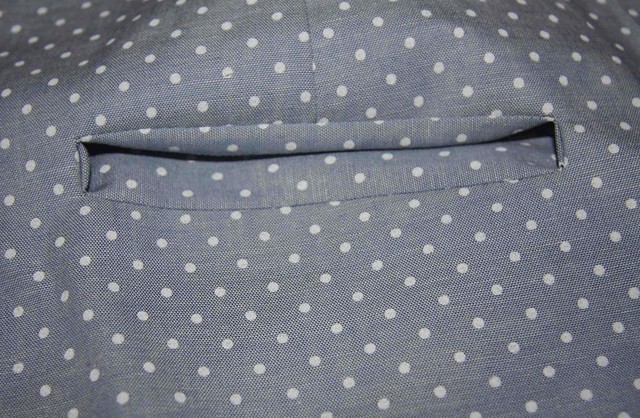
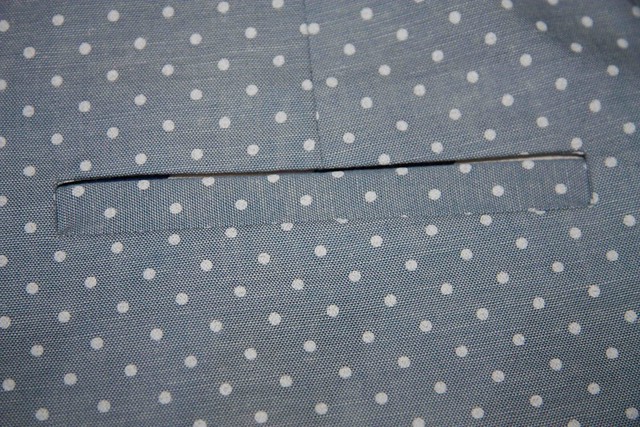
And we’re done!


This is probably the best welt pocket tute I've seen so far. I love the idea of folding the piece up rather than cutting a whole new window piece. It saves time and bulk. Bookmarked!
Fabulous!!! Have avoided this feature but now will definitely try it, even just to sample for future use. Thanks!!
Excellent tutorial Mel! Hope you're having a great time OS.
Cool – thanks for this. The welt pocket is on my list of things to learn this year. Happy travels.
Excellent! I want to try some pants with welt pockets eventually (I have done welt pockets before, but wasn't entirely pleased with the method/results), and I am totally going to use your tutorial. Thanks!
This is very different from any way I've done welt pockets! It's cool to learn different techniques! Can't wait to see these shorts, your fabric is gorgeous.
This is perfect! I just downloaded the new Colette Iris shorts pattern, and really wanted to add welt pockets. Thank you so much for sharing!
Wow, these are awesome instructions. Thanks for taking the time to share! Your little dotted shorts pockets look great. :)
Handy tutorial. I think I'll actually use this one tomorrow so awesome timing.
Wonderful wonderful tutorial. I love how you have folded up the pocket bag so that it can be inserted into the waistband for extra support. It is details like those that show we care about our garments :)
Great tutorial, thank you! I'm saving this for future reference.
Thanks for taking the time to post all these details – I've avoided welt pockets in the past but this makes them seem quite logical!
Thanks, I've made a reference on the Sewing Tutorials blog. Great instructions!
Very nice. :)
I tried my first welt pocket thanks to you. My first try is documented on my blog. http://kittenscloset55.blogspot.com/ Can't thank you enough! All the other tutorials made my hair gray!
Yay! I'm making a toddler's play suit from the 1940's as a baby gift tomorrow and it has welt pockets – I am so glad I stumbled upon this! Thank you!
Just tried a practice one…PERFECT!!! Super easy!! Man, what a life saver from what I WAS going to do!!! This is just the look I wanted, your tutorial was GREAT! I got a little confused at step 13 & 14, but then just figured to sew underneath and it fixed it, THEN I understood what you were talking about! ;)Thanks again, IT'S PERFECT, JUST PERFECT!! :)
Thank you for the detailed welt tutorial, I will definatley be coming back when I add some welt pockets. During a bag making workshop I was shown an Olfa Rotary Point Cutter, it has a curved blade and you put the tip of the blade into the corner and then roll it back, you can't cut the stitches and you can get so close to them. Of course I had to purchase one and can't wait to try it out for welts.
Tremendous tutorial! I gave you a mention in my latest post. Thanks so much!
So glad I found your tute. I am just learning to sew trousers and wanted to include a welt pocket (actually I didn't even know the name of it at first). Thank you.
Hey Melanie,I have just linked to this tutorial on my blog cause its awesome. Hope that's okay! :)
Arigatou! Great tutorial!
What a great tutorial… I have no current plans to make one of these but I’ll hoard this as a bookmark! :)
Thank you for such a wonderful tutorial!
Just wanted to say thank-you for this tutorial. I’m a second year fashion design student at Ryerson University and wasn’t loving the welt pocket given to us in our textbook, nor the teachers suggestions.
My pockets turned out beautifully because of this – – even passed on the website to my professor!
Thanks!
I just used your tutorial on my first welt pockets on a pair of pants and they were easy thanks to you!
Oh, so glad to hear it!! I must admit… after spending all the time trying to figure out how to sew welt’s, I absolutely adore them now. LOVE your pants (and your sewing in general, really)!
This is “jetted” pocket. A welt pocket is a bit different; a welt is completed and stitched by hand afterward. A welt pocket is raised whereas a jetted pocket is stitched in and is flat. I had a heck of a time finding directions for a jetted pocket until I came across a youtube that differentiated their names. He was a tailor and quits upset with the misuse of terms. I must admit I didn’t know their names either. Perhaps you’d like to share this info too. Called as it is – JETTED. Good tute, btw.
Jetted! Thanks for the info :) I’m always keen to use the appropriate term.
So last night I made my first ever welt, following your tutorial. And the results were none too shabby! Thanks for such a clear & detailed lesson, Melanie :)
My Pleasure, Jenny :)
Thanks! Can you make a part 2? Adding a zipper to it?
You made this so freakin’ easy to understand. THANK YOU SO MUCH!!! I’m in the process of making my first pair of trousers. I made the pocket with scraps and it turned out great!
So glad it helped!! :)
Reblogged this on Chic and Chick and commented:
DIY/ pockets tutorial
I wish I could use your instructions but I have a Kwik Sew pattern # K3884 (2016) that has a huge piece of lining I think it is for the pocket inside and welt pieces x 4 doing two welt pockets in the pant material. They attach one pant fabric welt to the top and the other further down. I mark the top welt with the sewing lines and cut etc as you did but then the instructions go Chinglish and I am lost from here on. Where does my nice welt flap come from and how on earth do all these pieces make a nice single welt pocket. I have been searching but all examples have a nice neat pocket that is inserted after the welt so I am none the wiser. I hope you can help seeing you struggled to get a nice welt pocket as I am trying to do.
Thanks to you I managed my first welt pocket: your explanations are very clear ( and I’m not an English native speaker) and the pictures are really helpful.
Thank you very much for sharing your work!
LOVE your tutorial! You’ve totally cleared this up for me, it’s been years since I’ve done a welt pocket. This technique is the best I’ve seen, and you’ve got ALL the steps pictured.
Thanks!
I just stumbled on this tutorial, its the best, clear and simple. I feel confident that I can now do this and be pleased with the result. Thanks Mel
My pleasure – glad you could make it work!
Thanks sooo much for this tutorial! Made it easy and even able to convert double welt to single. :)
This really helped me, thanks a lot!
thankyou, more than 12 years on, for probably the best tutorial on a single welt pocket out there.
You’re very welcome Val! Yes, even after all this time, and my lack of posting – this one still regularly gets visited. Glad it was useful for you :)