

Sleeve heads are designed to support the sleeve cap in coats and jackets (preventing dimpling!) and these days you can buy pre-made shaped ones, or square ones that come in a roll.
I like to make my own as I find the pre-made ones a little on the long side, and so that the shape of the sleeve head matches the shape of the sleeve pattern.
So if you’re making a jacket or a coat, and you’d like to use sleeve heads, here’s how.
1. Grab your sleeve pattern piece and trace it (I use a roll of non-waxed grease-proof paper for my tracing activities – inexpensive, easily found and plentiful!). Make sure you include the shoulder seam point and the grainline!
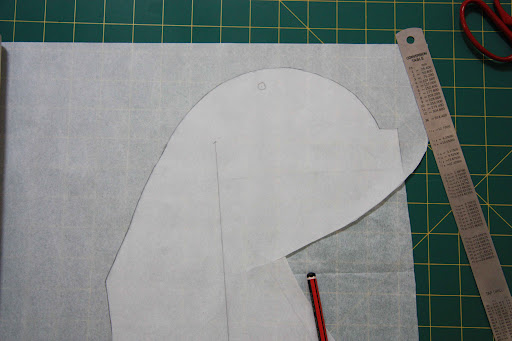
2. Draw in the lines of the sleeve head. Perhaps a little easier said than done? Basically it will be a little longer at the front of your jacket (the longer, sloping side of your sleeve pattern) and shorter at the back of your jacket). I make the sleeve head longer if I’m working with very heavy fabric, but for lightweight fabric like my wool, this should be adequate.
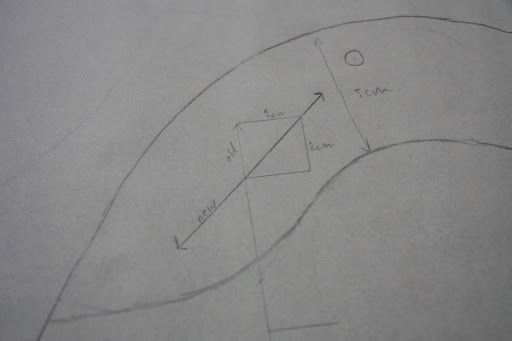
I’ve made this particular one 5cm wide, although I will probably cut it back a little depending on how it looks when inserted. It’s always easier to cut something back than try to increase it!

3. The sleeve head needs to be cut on the bias, allowing it to move around with you when you’re wearing the finished garment. To change the grain line I draw a 2x2cm square at the end, and the diagonal inside of this square is the new grain line.
Of course if you own a set square, you can just align your ruler and draw in your 45 degree angled line.
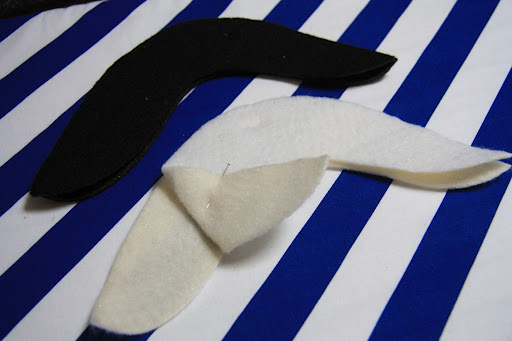
4. Cut out your sleeve heads – for garments that are dry clean only I use a cotton batting that I sometimes cover in lining fabric, otherwise mohair, fleece or flannel work just as well. You can layer them up if you’re working with a particularly crisp fabric that needs a bit of extra support.

5. To put your sleeve heads in, position your sleeve so you’re looking down into it (jacket turned inside out) and pin the head so that the shoulder seam points match:

For this step I’m using pictures from my Octopus’ Garden jacket because I realised that the current jacket I’m making (Vogue 8739) will not be fully lined, meaning that I needed to be a bit creative with inserting my sleeve head. This is the normal way to insert them – the sleeve head will then be hidden by your lining.
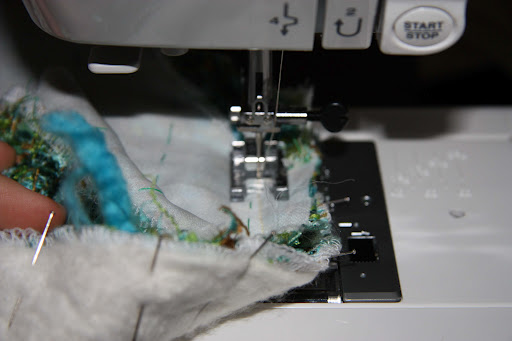
6. Sew them in – with the sleeve head facing down towards the machine (shown in the slightly blurry photo below) so you can see the original shoulder seam. Sew as close to this (if not right on top of it) to attach the sleeve head.
And that’s it! Sleeve heads will take your jacket from having dimples at the sleeve cap to being perfectly smooth. And it’s little details like this that make all the visual difference!

I have never done a sleevehead. Thanks for showing me the way, will incorporate this on my next jacket!
Thanks for the tips!! I'll definitely refer back to this post when I try a jacket.
Yes, sleeveheads definitely make a difference. Great tutorial. May I link to it on the sewingtutorials blog?
Hi Sigrid! Of course :)
You're welcome :)
No problemo :)
This comment has been removed by the author.
Hi Melanie, thanks. It's done: http://sewingtutorials.blogspot.com/2008/05/jackets-tutorials.html and deleted my first comment, it was in the wrong category, too late at night ;)
Hi Melanie, thanks so much for this tutorial – as usual, it was well written, easy to understand and with great results. Can't wait to see the outcome!!
This is a great tip! Thanks for the detailed how-to!
Looks good, they really make a difference with work I've done too!
You make it look so easy :o) Thanks for sharing!
This is how I have made mine too! I always have a scrap of quilter's batting available, so it seems easier than trucking into town.
I just realized that I forgot to order sleeve headers for the frock coat my son will be wearing at his wedding in two weeks (panic sets in). This has saved my life! Thank you!
4 years later and this post is still super useful!! no wonder it comes on top when you search for “how to make a sleeve head”. Thanks for sharing your knowledge, I’m off to find suitable fleece/batting :
My pleasure – thanks Sophie! ps – Any good quilting shop will have plenty of options for batting ;)
ah yes! as I’m not a quilter, I simply don’t think about that option ;)
Thank you so much for this excellent help and how-to advice. I’m making a long frock coat for myself, from the long tapestry curtains I had at my previous house. They were only two years old and weren’t necessary in my bungalow, so I washed the fabric and it will live on! I’ve not used sleeve heads before but am going to have a go today. Thanks again.