

Or at least, it was when I started making this coat. I got a bit worried at one point when the sun started actually coming out during the day, but now we’re back to being super chilly again, so all is well! (?) Serves me right for making a coat towards the end of winter, eh? No matter – I’m totally in lust with this creation anyway – to the extent that my gripes about Marfy patterns not coming with lining doesn’t even impact my cheshire cat grin. (No lining pattern? WTF?!?!)


That issue aside, this project was obviously a LOT more complex than my first Marfy pattern – the pleated front blouse which had a grand total of 4 pattern pieces. I tackled this pattern by sewing up a toile and practising the bits I was unsure of until I got them right, in addition to getting the fit right. I used this process to develop a bit of a construction order running sheet too – after all, methodical is my middle name. Although I’d be lying through my teeth if I said there wasn’t at least 3 times where I threw my test run on the ground in frustration and griped to Mr poppykettle about how un-enjoyable and frustrating sewing can be!
But the best part about dealing with all the issues during the toile phase is that when it came to actually making the final version of the blasted thing, I could afford to just concentrate on sewing, safe in the knowledge that a) it fit me well and b) I knew how to put it together. Good thing too, because it required a mammoth effort.
What I really love about the finished garment is the pockets – unlike normal coats where pockets are a part of the side or princess seams, these pockets are totally ergonomic. I don’t even have to look or think where to place my hands into these babies – they just slide in! Not to mention that the pocket bags are deep and extra spacious – I can practically dangle my arms around in them without meeting any fabric resistance. Tick!


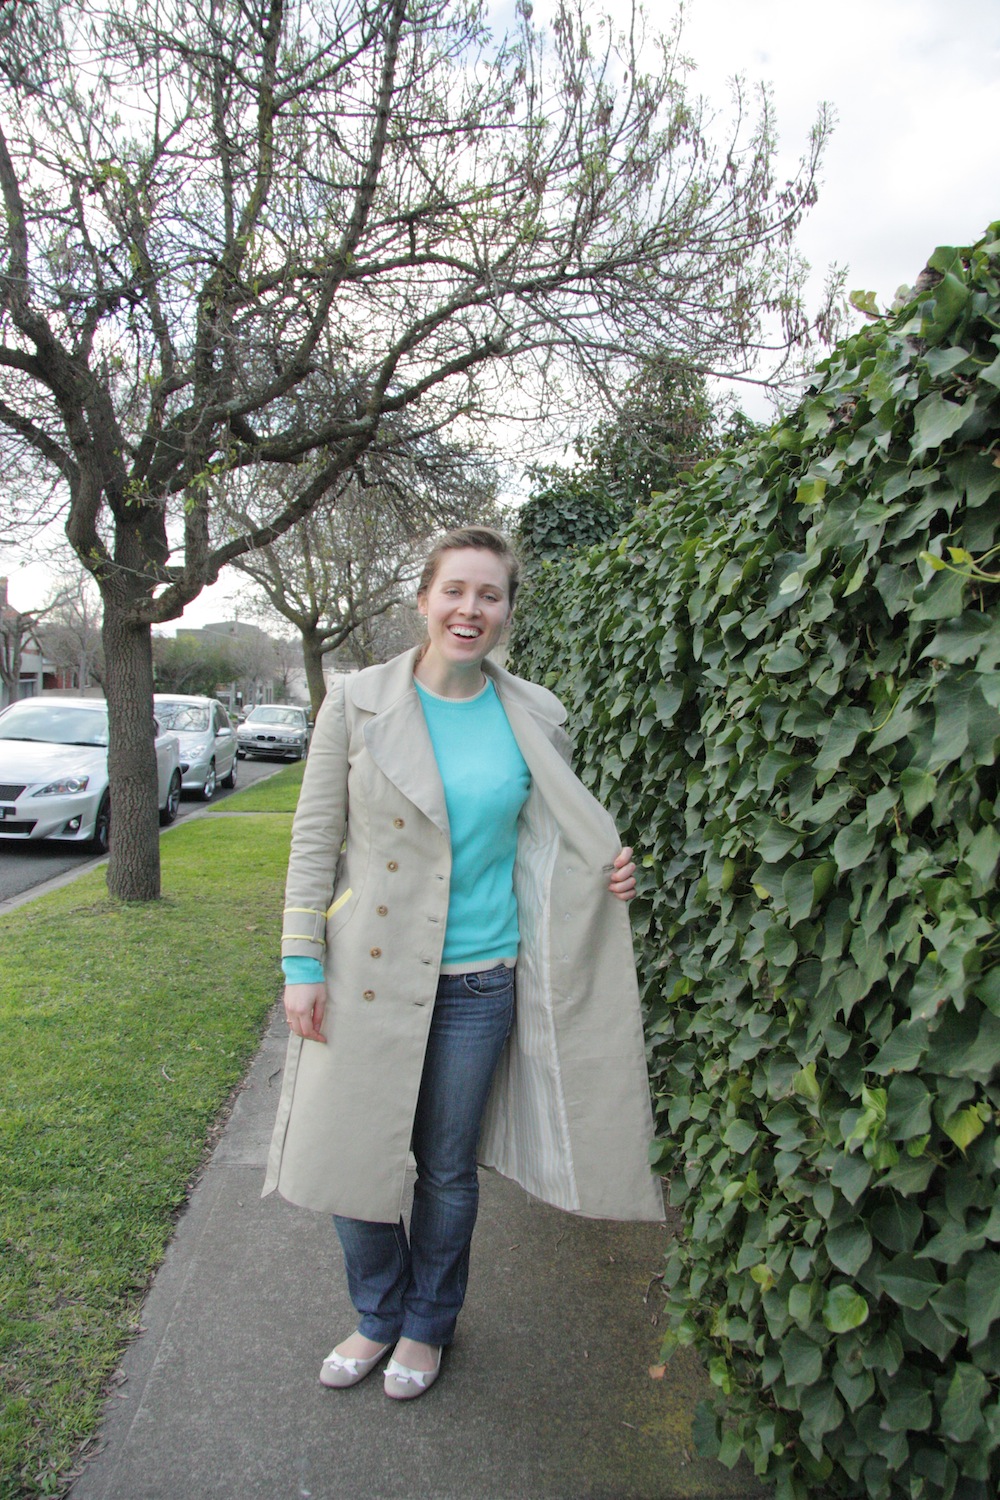
The hardest thing I find with sewing a pattern from an ‘untried’ pattern company is knowing how much ease they include versus what you consider to be appropriate. I bought a size 46 pattern which is designed for a bust of 96cm. Made up to specification before I altered the pattern to fit, the bust measurement of the finished garment was 111cm. My bust measurement sits at 99cm, so the ease was just on the larger side of being perfect for me here – I took it down to about 106cm. Our winters might be cold, but not cold enough that I need to wear excessive layers underneath :) As the pattern seemed to have minimal shaping at the waist and hips (in comparison to my measurements anyway), I took in all of the seams around here to prevent it taking on the appearance of a paper bag. It still looks pretty straight up and down without the belt though.
The sleeves also caused significant headaches. They are absolutely my point of contention in sewing. Had I been using one of the recommended fabrics (cashmere, vicuña – drool) the amount of ease allowed for in the sleeve head wouldn’t have been an issue to include. But the canvas I used was significantly more unforgiving in this regard, and there didn’t seem to be a way to incorporate the ease without some significant and unsightly puckers and gathers. After altering and resetting the sleeve on my toile multiple times, I gave up and went back to my tried and true sleeve pattern from V8333. Can I just say yet again how much I LOVE this sleeve? It’s the third time I’ve appropriated it! I still had to altered slightly, and the result isn’t perfect, but it’s a bucketload better than Marfy’s sleeve.
And as always, it’s the little things about sewing a garment that draw me in. So now that you’ve had a chance to view the forest (so to speak) – shall we look at the leaves?
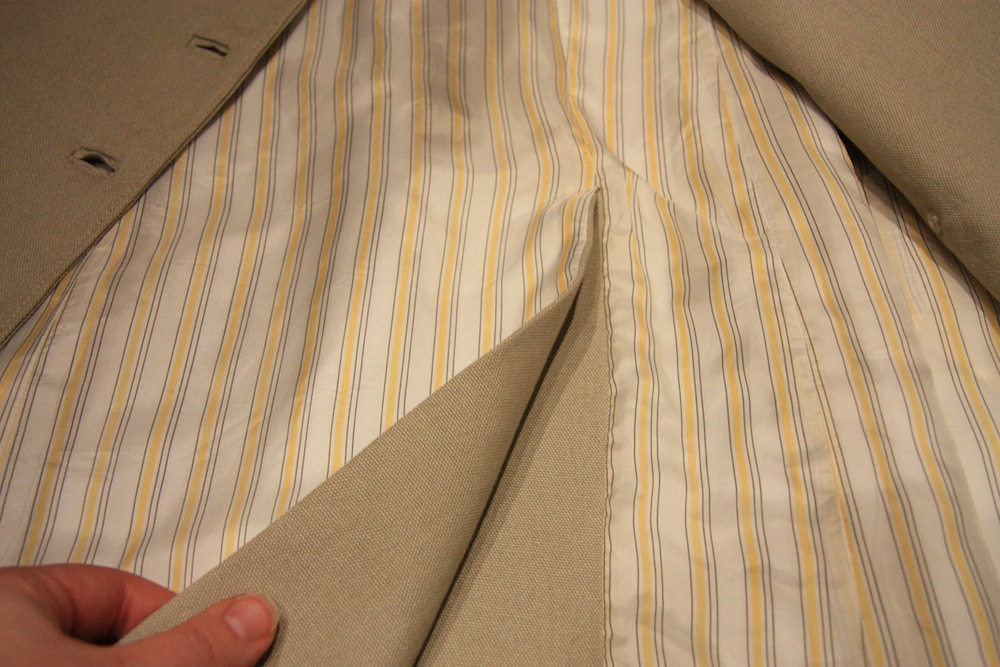


The main fabric is an oatmeal coloured canvas, the yellow detailing is from the leftover stretch cotton from my Caramel Slice Marfy and the lining is a striped viscose/acetate (Fendi Lining #8) – a Tessuti Trifecta! I bought the canvas yonks ago in the thought that I’d be making the iconic McCalls 5525 trench coat – for some reason I though I needed 6m of fabric for this (I must have done something stupid in the conversion from yards to meters…) I ended up using 3.1m for this coat. And to think I was worried I might not have enough. What a dill!!!! Good thing it was inexpensive, but still the wastage from my lapse in reasoning really ticks me off. I might have to make the 5525 for a friend to use it up…
In other matters, this coat was an absolute thread HOG. I’m talking nearly 3 whole 100m thingies of normal thread, quite a bit of silk thread and 2x30m thingies of topstitching thread (Do those thingies have names?). Sheesh! Its the first time I’ve used proper top-stitching thread – it’s like rope in comparison to your standard everyday stuff. I had to hoick my machine’s tension up to 8 before the bobbin thread started to behave though – thats totally hardcore.
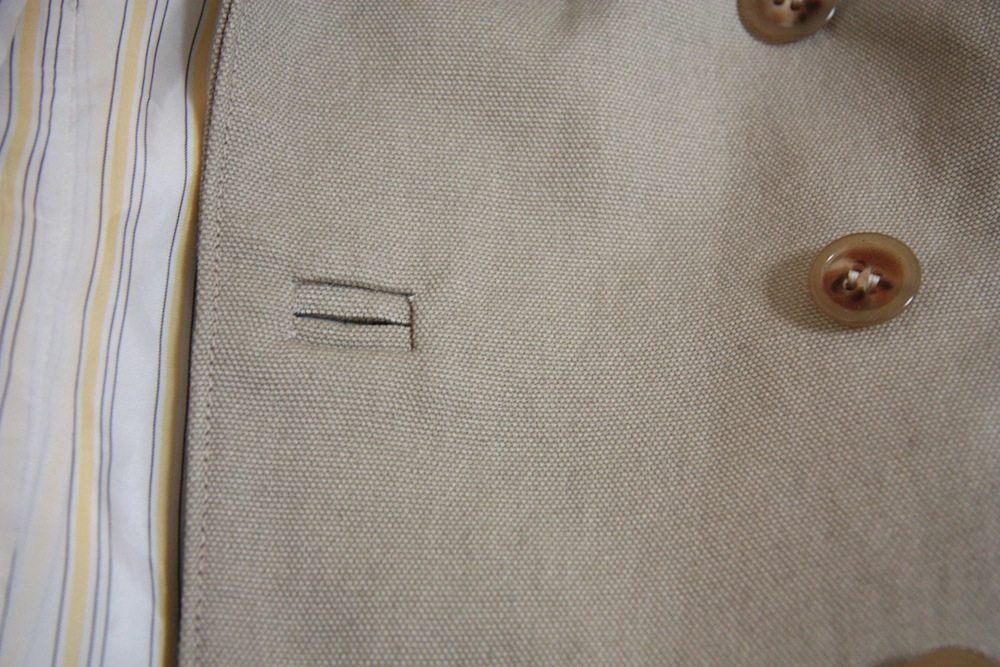
The buttons are vintage horn in a pale tortoise-shell, acquired from L’ucello. I was actually on my way into Buttonmania to see what they had to offer, but the entrance to this little shop (on the same level) caught my eye and I’m super glad I went in – it’s really beautiful and full of all sorts of yummy vintage haberdashery. They don’t have a website yet but their blog gives you a good indication of the yummy things they stock. Do stop by if you’re in the area – you won’t regret it! I used some small transparent buttons on the reverse side to stabilise the buttons you actually see – its a good way of taking some of the stress away from the fabric (and I totally copied it from one of my RTW garments).
I made a few changes to the pattern – like making the sleeve cuffs long enough to go around the entire sleeve, changing the belt to a longer style (and adding in belt loops at the side) and including at the centre back seam a knotted thread connecting the jacket and the belt, an idea I stole from my RTW green trench coat. It was the first time I’ve used by automatic buttonhole foot too and it worked like a charm (I used this on the cuffs only) and the end result is really good. I used bound buttons holes at the front. Drafting the lining was a new challenge – and it seems to have worked successfully too. Win!
The yellow curved welt pockets needed a partner in crime – it looked a bit odd and unbalanced with just a single splash of colour. Having a matching trim around the sleeve cuffs evened this out nicely I thought.
Even after all the hard work and frustration, this coat has been totally worth it. I just know I’m gunna love wearing it! Will it replace the spot in my heart where my green trench coat resides? Only time will tell…


It's amazing
Just love it!!! But I am sure with Melbourne'e typical weather you will be able to wear this in December (ha, ha!!!)….
Srsly WOW!!!
Fantastic coat – great job – I think there is still a bit of bite left in winter!
A superb effort! Interesting to hear of your Marfy experience. I have a blouse pattern of theirs that I was curious to see how the sleeve compared to other pattern companies. Thanks for all the details on the sewing. I have not seen threads connecting belts to jacket backs but that is an awesome idea…rather than finding that the belt has slipped and one end is trailing on the ground.
What a fantastic job – looks absolutely fabulous!!! I was tempted to buy a coat pattern for Jess but not sure now – a lot of work!! and no lining pattern hmm… Having said that, you've done a brilliant job on your coat – so worth it!! Q: your green trench coat – what pattern no. is that, currently making one and want to change the collar – thanks. E.
i love this! every detail is perfect, and the yellow is just the right amount of contrast to keep it interesting. having some serious trench coat envy now…
That is one gorgeous coat. The details are great, the fit is spot on, the yellow accents are lovely. Well done!
Sweet this is the best sewn thing I've seen all year. The work you've put into it is obvious. I'm starting on a trench now but its a fun and easy one XD What are these shops you speak of? I've hear of button mania (never been) and Lucello but this other one.. I am intrigued. Google map links in your next post please..
*heard XS
Wowsers! What a coat! Love the yellow accents
Lokks fantastic! I love the pop of colour from the yellow and your top stitching is just perfect!
This is gorgeous. I'm in awe – can't imagine being able to get through a pattern without instructions.
I'm in awe of your skills and your patience. Congratulations on another amazing sewing adventure!
What a wonderful coat. Such detail!!!
I am amazed at how you can make such a difficult pattern. I'm so slow at sewing that it would take me ages to get that coat finished. It is beautiful. And by the way, those "thingies" are called spools. ;)
This is bloody fabulous! I LOVE the curvy yellow welts and you have done such a great job – well done!
I hope you are ready to continue to receive great comments about your coat ecerytime you wear it in real life. It's beautifully made and fitted.
Great coat! Love the yellow accents!
Wow, what an amazing coat. You have done a brilliant job with every element.
WOW!! Your sewing skills are amazing. The fit is perfect – you look so chic, and the yellow accents makes it extra special. Wear this to our meet-up — I want to see it in person!
What a beautiful job. Your coat is perfect, I love the yellow accents. The fit seems like perfection well done.
Ooooh, your hard work paid off! The little pops of yellow detail are super.
WOW, gorgeous coat. The details, both the yellow ones as the pattern details are so nice.
Your coat is just amazing. Neat stitching like yours looks so gorgeous on canvas, and all the little details look just perfect!
Oh yeah! …that pretty much sums it up.
This is absolutely gorgeous! I love it! What a chic, beautiful coat! I know you'll treasure this for years!
You're right on the mark… think I was still wearing a coat in November last year! (at least, in the mornings and evenings anyway)
I'll still be trying another pattern of their's with sleeves before I condemn them to the fiery pits of sewing hell, but yeah, this certainly wasn't a pleasant experience. Hopefully yours will have a better outcome than mine!!
Absolutely. Spring is still a little while off yet!
Thankyou! Unfortunately, the green coat is RTW, not a pattern. If it was a pattern, it would be the best coat pattern ever though. Goodluck on the coat for Jess!
Aww, thanks Lisa! :)
Thankyou! :)
ooh – goodluck on the coat – looking forward to seeing it! those two shops are on the second floor of the Nicholas building – corner of Swanston and Flinders lane in the city. You simple MUST visit them! Gorgeous things!
Thanks Julia! :)
Thanks Suzy! :)
It was rough, lemmetellya. Funnily enough, I'm following the instructions to the letter for the project I'm now working on. It feels good to have someone else tell me what to do for a change! I'll never take instructions for granted again, I promise!
Thankyou Amy!
SPOOLS! Thankyou – you've made my day. I knew they had a name and couldn't for the life of me remember!!! :P
Thankyou Faye! :)
Thanks a million! :)
Don't worry – I was planning to. I want to get as much wear outta this baby before it gets warm as humanly possible! See you soon!
Thankyou! I just adore your handmade leather gloves btw. So cool!
Thankyou!! :)
Thanks Marie! :)
My thoughts exactly, Katarina :) Thanks!
I'm an addict for topstitching now, I'll happily admit! Cheers :)
Thanks Ginger! I think so too :)
Thanks, Sigrid! :)
Thanks, Lisa! :)
Thanks Karin – I'm in love with the yellow too!
bahaha! you beat me to it! 'thingies' gave me a good giggle though ^_^
I'm always so excited to see your finished makes; your attention to detail & couture level of skill always inspire me!! I LOVE the sleeves & the gorgeous yellow details especially – WONDERFUL job!!! ^__^
Wow, perfekt!!LGChristine
Oh my this is a fab coat. Congratulations on such a great result from so much work. I'm dead dead impressed :o)
The cuffs! The pockets!! The buttonholes!!! Far out brussel sprout, it's amazing :)
Gorgeous! The details are so enviable. I direct a strong spray of envy in your direction.
Wow! That whole engineer's approach really pays off on a project like this. Seriously, hats off to you- an exceptional, inspiring job. May it work as hard for you as you did for it!
I love this coat, I have never tried a Marfy pattern, I might have to give this one a go as it looks fantastic. A great wardrobe staple item too.
Your coat renders me speechless, this is absolute perfection, your skills are truly something to aspire to, as is your patience for such intricate and time consuming makes.
Agree with all of the above. Your craftsmanship is impeccable and it's obvious that the hours and hours of preparation you put in paid off. I bet you'll get lots of "do you mind if I ask where you got your coat?" comments
You must be so proud of this beautiful coat! I cannot imagine attempting such a complicated and important piece of clothing. Congratulations – it's beautiful!
This coat turned out so gorgeous! I am always so impressed by your meticulous approach to such complicated garments. I love the yellow details you included. I'm going to have to check out this miraculous V8333 sleeve!
Melanie,I wish one day I can sew as good as you! :) it looks awesome!
What a beautiful coat! it looks absolutely fantastic on you. I love the edging on the pockets and the colours you have chosen. Superb!
What a beautiful and timeless coat. All your details and perfection.
I am obsessively in love with your coat! The details are fantastic, and I love the subtle pop the yellow bands add to a really classic coat. Beyond fabulous. Totally an inspiration for when winter comes around my way…
Awesome!
Thanks so much Symon :)
Thankyou Christine! :)
Thanks Emily! :)
Why, thankyou Megan! :)
hahahaha, Thank you!
Methodical is my middle name ;) Thank you!
I'm still totally in love with Marfy patterns – and I'd recommend them if you don't mind the challenge! Goodluck :)
Thanks so much Deb :)
Not yet, but I'm patient ;) Thanks Marianna!
Why thankyou so much :) Love your work, and can hardly believe you've reached the year end of your challenge!
Thankyou! Indeed do – it's easily my favourite-est sleeve ever ;)
I'm sure you will :) Thank you!
Thankyou Carolyn! :)
Thankyou Bernice! :)
… and it will eventually come around unfortunately! Thankyou! :)
Thanks Mrs C! :)
I need to make myself one of these… I love your detailing! :D